How to Improve an Average Render into a Pro Render
A decent AI video shot is not enough on a serious screen: layer-by-layer diagnosis, a solid post chain, controlled upscaling and rejection discipline to go from an average render to a pro render with no magic or misleading promises.
You finally have a sequence that "runs", a clean image, a movement that is not ridiculous, and yet something is off when you put it full screen or send it to a client used to broadcast. It is not a personal failure. It is the difference between an average render that impresses for five seconds in a social feed and a pro render that holds up to reading, compression, critical feedback, and sometimes projection. If you want to improve an average render into a pro render on an AI video, you have to stop treating the problem as a single magic slider and start treating it as engineering: stacked layers, separated responsibilities, and visible proof.
This guide is deliberately down to earth. It assumes you already know how to produce a clip, but that you want a rise in perceptual and technical quality. You will find a diagnostic method, a work order that limits regressions, classic traps of the "demo" world, and links to the site's tutorials so you do not reinvent grading or realism.
So you do not navigate the post side alone: the article how to add realism in post-production details the chain after generation. For "cinema" culture with no Instagram posture, how to go from an amateur render to a cinema render lays direction safeguards. When you have to lock the color seriously, how to grade an AI video in DaVinci Resolve will give you a software framework. Finally, if your master is clean but too small or too fragile for a client enlargement, upscaling a video or an old short film to AI 4K situates upscaling as a tool, not as a wand.
Average render, pro render: two languages, two tests
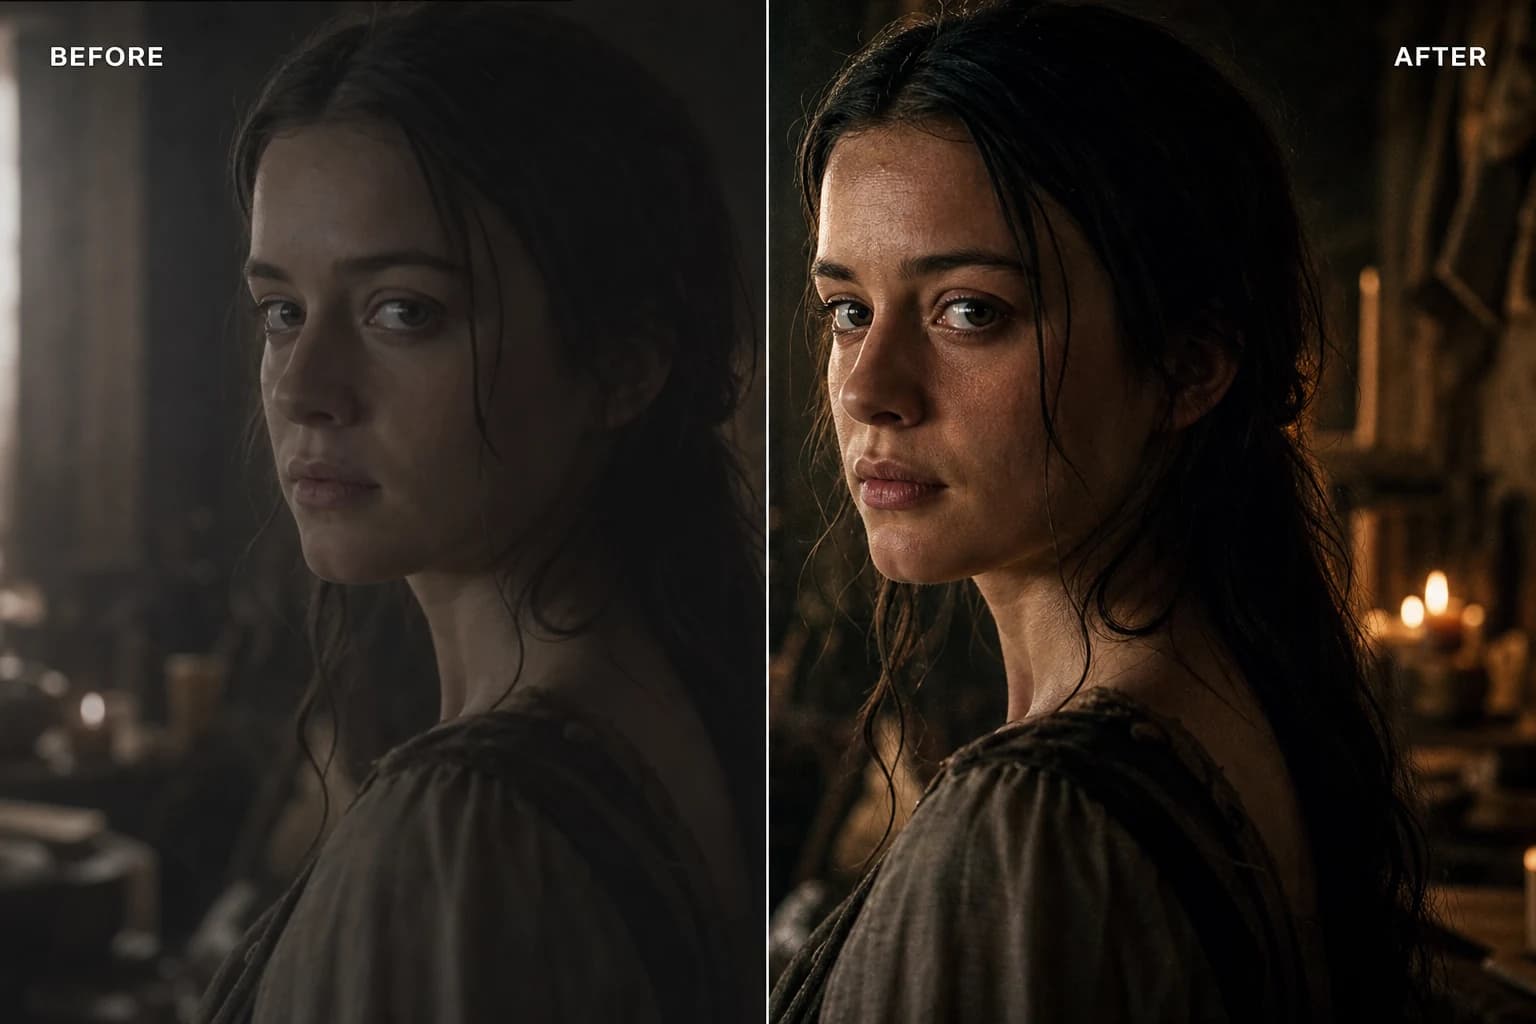
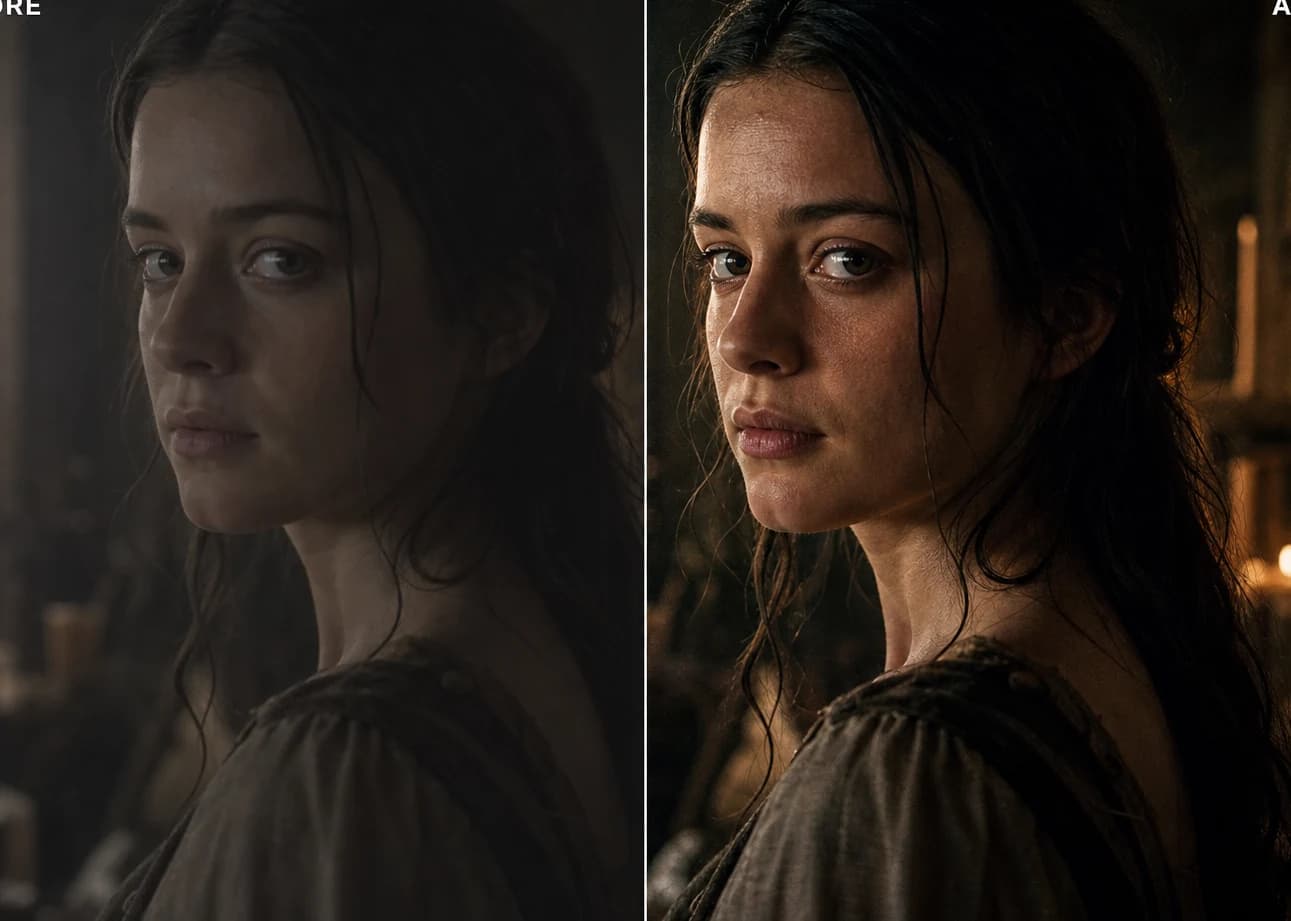
Average render, in the mouth of a DP or an art director, does not mean "bad". It means: acceptable in a thumbnail, fragile in full frame, sensitive to the slightest aggressive setting, and often dependent on an instant "wow" effect that does not survive a second read. The professional viewer is not meaner than the general public. They are simply trained to spot signatures: global digital sharpness, plastic skin, light with no motivation, inconsistent micro-movements, look variations between shots, compression that turns your flats into waves.
Pro render is not synonymous with "expensive" or "huge team" either. It is a quality where the narrative gains a perceptual stability: the eye knows where to land, the values hold, the movement does not betray the physics unless you own it, the sound does not contradict the image, and the file can travel without you being ashamed of the last export. In AI video, this transition often demands more discipline than a new model. The temptation is always the same: change tools when the problem is a missing step in the chain.
Many creators confuse "HD" and "pro". An image can be large in pixels and stay amateur on the reading of the materials. Conversely, a modest but intelligently graded master can survive a distribution pipeline better than a saturated, garish 4K file. To improve an average AI video render into a pro render, start by defining the test of truth: where this file will be seen, by whom, for how long, and with what level of attention. A reel and a serious pilot do not obey the same criteria, even if you can reuse 60% of the method.
The five-layer diagnostic grid
Instead of "it does not look pro", impose a repairable vocabulary on yourself. Note your observations on five lines. You gain speed and you avoid regenerating everything out of superstition.
Layer 1: intention and brief
A brutal question: do you know what the shot must prove in one sentence? If the answer is vague, no technical detail will save the general impression. The brief is not a marketing chore. It is the safeguard that prevents the model from aiming for "pretty generic" instead of "precise scene". Write: subject, action, camera distance, felt focal length, time of day, air quality, brand constraint if it exists. Even five lines change the overall consistency when you chain several shots.
Layer 2: light and geometry
An "average" light often mixes several dominant directions without the scene justifying it. The pro render owns a hierarchy: one main source, plausible bounces, shadows that obey a single "why". On a character, look above all at the bridge of the nose, the light collar, the eye-to-eye consistency with the set. On a set, look at the reflections and the surfaces: does the metal react like the fabric? If not, you can sometimes save it in post, but the mental cost explodes.
Layer 3: material, texture, depth
"Average" AI videos shine with a suspicious cleanliness. The material seems washed, the depth jumps depending on the zones, the "HD" details become an equal dust everywhere. A pro render finds a motivated texture again: what must be soft is, what must carry real or cinema grain carries it, without standardizing the world. It is not an injunction to be "dirty". It is an injunction to be varied with a law.
Layer 4: time, movement, breakdown
Video adds a test that the still image masks: causality over time. A shot can be magnificently frozen and decompose as soon as the hair, the fabrics, or a reflection move. Note the precise moments where your eye lands and stumbles. These are your feedback tickets, not a global opinion. If you do not timecode, you spend your days fixing the wrong problem.
Layer 5: finishing, delivery, compression debt
An export too light, badly owned chromaticity, aggressive sharpening before YouTube, grain laid like an Instagram layer with no frame-rate hold: all of these "almost pro" signatures break at the last kilometer. The pro render thinks destination. A master is not necessarily the same file as the proxy. A client editing in another software does not need your aesthetic conviction about the noise if you do not deliver them a clean option.
This grid is deliberately simple. Its goal is to turn "I do not like it" into "layer 3, second 02, inconsistent texture on the leather". That is how you can improve an AI video render without drowning in parameters.
Upstream strategy: less magic, more useful constraints
Before opening Resolve or an upscaler, ask yourself an engineer's question: is your debt structural or finishing? A structural debt, you feel it when you have to lie enormously in post for every second. A finishing debt is corrected when the overall geometry and the light hold.
The most frequent "average" mistakes in prompt and engine settings
First mistake: stacking contradictory adjectives. "Cinematic, hyperrealistic, 8K, drone, anamorphic, pastel, strong contrast" does not create a rich style. It creates a compromise where the model randomly chooses what it sacrifices. Second mistake: focusing only on resolution. Third mistake: ignoring continuity if you are preparing several shots of the same scene. Fourth mistake: changing tools halfway with no versioning, then blaming the last export.
A pragmatic approach is to lock a pilot shot: a still image or a very short movement tested with no ego. You run this pilot through your diagnostic grid. When it reaches an "acceptable full frame" level, you derive the scene from it rather than going back to random prompts. It is less spectacular in a LinkedIn story, but more profitable if you want a pro AI render in the sense of "billable".
Character and set continuity
If your project is narrative, the average quality often comes from character and set drifts between shots. Document a mini pack: dominant colors, desired grain pattern, three light references, framing template. Even minimalist, this pack avoids the "demo showreel" ruptures that do not pass with an attentive viewer. For the angles and the scenic reading, go back to the fundamentals already covered on the site via the framing and direction guides: the idea is not to recite a manual, but to align your engine text with a real camera decision.
Post-production chain: the order that avoids destroying what you gain
When you go from average to pro, post becomes an amplifier if your upstream holds, and a problem revealer if your upstream cheats. The following order is not a universal religion, but it reduces the destructive back-and-forth in most AI image workflows.
Step A: stabilize the reading truth
Export to a clean intermediate file, frame rate checked, no "miracle" effect glued too early. Watch on several realistic screens, not only in the SaaS player. If you do not have a calibrated monitor, at minimum vary the laptop brightness and test on a phone. The average render often survives a single viewing condition. The pro render owns itself on two or three.
Step B: primaries, hierarchy, skin
Before a complex look, rebuild a value hierarchy. Where is the subject? Where should the eye land first? On generated faces, the skin is the classic trap: you want living texture, neither ceramic, nor a patchwork of micro-contrast that moves at the slightest movement. Work by soft zones, compared, with short A/Bs. If you push too far, you often get the "algorithmic beauty" effect typical of AI demos.
Step C: secondary look, inter-shot consistency
A look worthy of the name obeys a color law: why this cold, this warm, this desaturation. Document the law in three sentences in a text file next to the project. AI videos often signal their "average" level with aesthetic-family jumps at the next cut. If you must vary, vary within the family. Changing the whole LUT because "this shot is prettier this way" destroys the long reading.
Step D: texture, grain, motion
Grain is not a "cinema" sticker over an inconsistent image. It serves as glue when the chain is already healthy. If you add heavy grain to mask plastic skin without correcting the skin, you often get mush. For the movement, talk in terms of acceptable fluency: does the camera obey a human intention or a preset that shakes the scene? On this terrain, the site's articles on movements and realism are useful; here, keep in mind that post does not fabricate an absent physics, it sometimes attenuates the perceptual brutality of the errors.
Step E: delivery, versions, future debt
Prepare at minimum two paths: a relatively "neutral" master for reuse, and an adapted distribution version. Name with no shame: scene08_master_primaries, scene08_client_sdr, rather than eight final_final. The pro render is also a story of archiving: next month's you should not spend an afternoon rebuilding your intention because everything lived in your head.
To go deeper into the philosophy of this chain without repeating everything here, go back to reading how to add realism in post-production: it is the natural companion of this guide when you go from theory to the concrete timeline.
Upscaling and restoration: when enlarging helps, when it lies
Upscaling is tempting because it promises a rise in "specs" visible on the spec sheet. But the viewer does not read the specs. They read the material. An abusive upscale on an unstable base can amplify artifacts, harden textures, or give that "generic AI HD" look that screams its provenance.
Use upscaling when your image intention has arrived and you lack pixels for the destination, or when you have to recover an old master for a new format. Treat the tool as a guided reconstruction module, not as a replacement for the brief. Keep an eye on the edges, the fabric textures, and the flat zones of the face. That is where the errors come out in projection.
For the use cases and the classic traps, follow the guide upscaling a video or an old short film to 4K with AI.
If you grade seriously afterward, mentally link these steps to how to grade an AI video in DaVinci Resolve: the upscale sometimes changes the distribution of apparent detail; your grading must follow, not blindly precede.

Sound, sync, and the "invisible" finishing
A render can be visually "pro" and fall back into the amateur category if the sound betrays the promise. Approximate lip sync, music too loaded, the total absence of ambience, or a scene noise too clean break the presence as surely as an artifact on the cheek.
You do not have to mix sound like a Hollywood studio to move up a grade. But you must at minimum: respect a considered dynamic, avoid absurd contrasts between shots, and treat the sync as a delivery criterion, not as a bonus. The brain sometimes forgives a fragile image if the sound carries the emotion; the reverse is much rarer.
Professional culture and honest watch
There is a nuance between following the model fashion and following a pedagogy that helps you structure your work. Some channels insist on the method rather than on the miracle of the latest button, and that is precisely what you need when you want to improve an average render into a pro render without burning your mental health. A simple idea has long been hammered home in the creative economy: value comes from the clarity of the offer and the proof, not from the number of tools on the shelf. Translation for us: a readable AI pipeline beats ten poorly digested subscriptions.
This does not mean chasing complexity. It means chasing repeatability. A pro creator can explain why their shot works. An average creator often says "I got lucky on that seed". Luck exists. Delivery, though, should not depend on it 80%.
Quick decision table: where to invest an extra hour
| Main symptom | Priority lead | Lead to avoid |
|---|---|---|
| "Plastic clean" image | material, skin, soft primaries | aggressive global sharpen |
| Light inconsistency | back to brief or targeted regen | extreme LUT by patch |
| "Demo" shots with no thread | look law and continuity | new effects per shot |
| Lack of sharp pixels for the target | controlled upscale after stabilization | upscale before having a stable image |
| Movement that betrays | rethink the movement at the source | cosmetic motion blur everywhere |
"45 minutes" protocol to get out of the average zone
Minute 0 to 5: write the shot's proof sentence. Minute 5 to 15: run the five-layer grid noting three defects max, not fifteen. Minute 15 to 30: a single layer becomes the targeted priority (for example light or texture). Minute 30 to 40: A/B with a named criterion ("face preference at 100% zoom", "mobile readability", "shoulder contrast"). Minute 40 to 45: archive the decision in a text file with the timecode and the chosen version.
This protocol seems dull. It replaces days of fumbling. It is often the difference between someone who "runs with AI" and someone who does the craft with AI.
Psychological traps: when the average render traps you through ego
The average shines fast. The pro is judged slowly. You can confuse the excitement of the new clip with the delivery quality. You can also confuse fatigue and taste: at 2 AM, everything looks alike. For this reason, schedule short cold reviews. Ten minutes the next morning are sometimes worth two hours of band-aids the same evening.
Another trap: perfectionism that regenerates with no criterion. You do not optimize an equation if you change three variables at each attempt. You explore. Exploration is legitimate, but it is not the same phase as closing. Close early on certain shots, otherwise you never learn what your pipeline really promises.
Connecting it all to a rise in cinema with no posture
If you want a more "cinema" direction in the narrative sense of the term, the guide how to go from an amateur render to a cinema render stays a useful compass: reduction, rejection, lighting law, rhythm. It is not contradictory with the "pro corporate" or advertising quest. A spot can be cinematic without being pretentious. The important thing is to avoid the collage of aesthetics that signals to the viewer that each shot comes from a different prompt with no conductor.
FAQ
Foire aux questions
Réponses rapides aux questions les plus fréquentes sur cet article.
What above all differentiates an average render from a pro render on an AI video?
The stability over time and over several screens. An average render can impress for a second; a pro render holds when you watch calmly, when you zoom, and when you compress it for distribution.
Do I have to change models to go pro?
Not necessarily. If your debt is mostly finishing, the same chain with a better post order and a better lighting law is often enough. If the debt is structural (anatomy, perspective, impossible light), changing models without correcting the brief does not solve much.
Does cinema grain fix a plastic render?
Partially. Grain can harmonize an already-coherent image. On plastic skin with no correction, it masks more than it convinces. Start with the hierarchy and the material, then add grain as a fine glue.
Does upscaling replace good upstream decision-making?
No. It enlarges and reconstructs details under hypotheses. If the base hypothesis is inconsistent, the upscale often amplifies the strangeness rather than the useful detail.
How many versions should I keep per shot?
Few. Two serious options per closing step, not fifteen emotional archives. Document why A beats B, otherwise you fall back into randomness.
Can grading alone save an average AI video?
It can push a good material toward an excellent deliverable. It does not save a scene whose geometry tells a different story from the light. Use the Resolve tutorial as a framework, not as a miracle.
How do I know if I am exploring or delivering?
If you change more than one major variable between two attempts, you are exploring. Delivery fixes a criterion and closes. Alternate the modes consciously rather than mixing the two out of fatigue.
In summary, improving an average render into a pro render on an AI video is not a race for the latest filter. It is a discipline: diagnose by layers, lock a pilot, respect a post order that does not lie, use upscaling intelligently, and finish with a delivery thought out for the real destination. If you keep only one sentence, let it be this one: the pro reduces the parasitic digital signals until only the intention remains, then documents so they can redo the same tomorrow without guessing.