Creating an Actionable Moodboard for AI Production
Turning an inspiring moodboard into an operational document that guides prompts, shots and post-production.
You spent three hours on Pinterest. Sixty gorgeous captures. First generation: cold light, no grain, plastic faces. The moodboard was beautiful. It was not actionable.
Creating an actionable moodboard for AI production turns a vague intention into a visual contract that drives every prompt, every shot and every correction in post. This guide lays out the method I use on ads, short films and client content. Not an inspiration board to stick on the wall. A working document that your team, your client and your generation engine can read without guessing.
Why your moodboard drives nothing
A classic moodboard shows what you like. An actionable moodboard shows what you impose. The difference lies in four layers that most beginners mix up or forget.
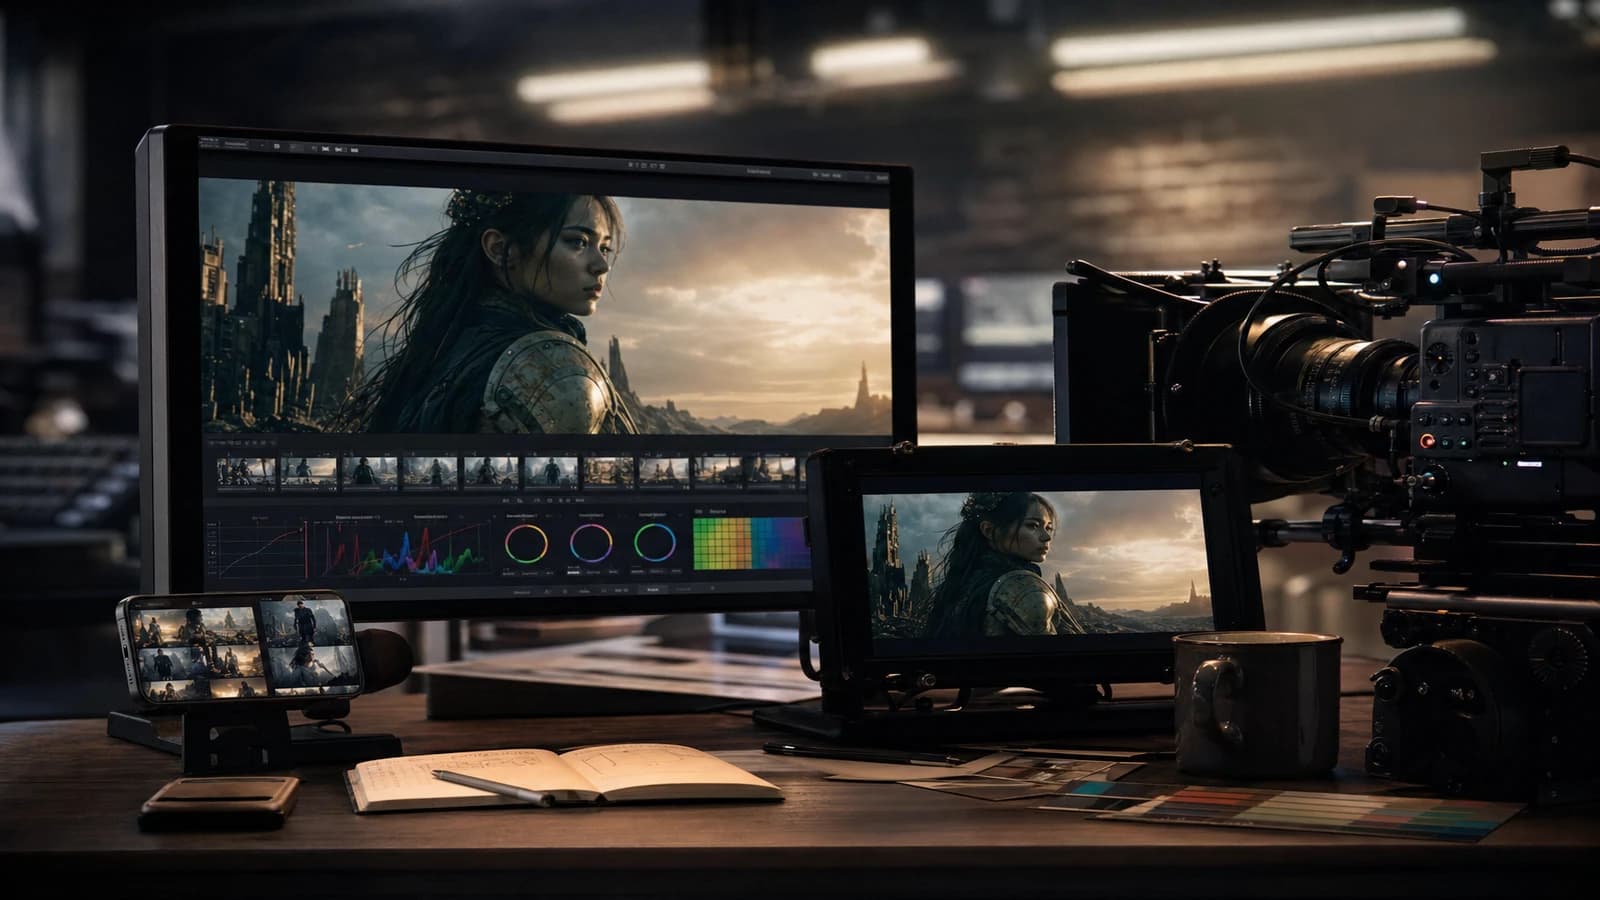
The first layer is translated light. Not "warm mood". Rather: key at 45 degrees, temperature 4200 K, fill at minus two EV, optional rim on the right shoulder. When you write that on the board, you can copy it into a prompt or check it on a generated shot. Without this layer, you collect pretty images that share no lighting hierarchy.
The second layer is camera geometry. Dominant focal length, eye height, subject-to-background distance. A moodboard that mixes dramatic 18mm and portrait 85mm without saying so will give you inconsistent shots even if the color matches. Note the focal length on each reference. If an image pleases you but uses a focal length incompatible with your script, file it under "emotional inspiration", not technical reference.
The third layer is the operational palette. Three dominant colors, one accent, the allowed neutrals. Export hex swatches if you can. When you grade in post, you compare the shot to the swatch, not to your memory of the Pinterest board.
The fourth layer, often missing: the negative reference. What you refuse. Porcelain skin, garish HDR, impossible reflections, a stock gradient sky. A "banned" box is worth ten "cinematic" adjectives in a prompt.
| Board element | Question to ask | Deliverable format |
|---|---|---|
| Light | Where does the key come from, what temperature, what ratio? | Sentence plus arrow diagram |
| Camera | Which focal length, which height, which movement allowed? | A single value per sequence |
| Palette | Which tones dominate, what max skin saturation? | Swatches plus a graded capture |
| Materials | Which recurring surfaces, which accepted reflections? | 3 to 5 named materials |
| Negative | What breaks the project? | A short list in red |
To build consistency over time, cross this work with how to create a consistent visual world with AI and how to organize your AI assets like a pro.
Workflow: from brief to a board that generates
Step 1: extract the client's intention in three sentences
Sentence 1: who is watching, in what commercial or narrative context. Sentence 2: what the viewer must feel at the end of the shot or sequence. Sentence 3: what is visually banned. If the client sends twenty references with no hierarchy, your work begins with a ruthless triage. Keep five images maximum as technical anchors. The rest feeds the emotion, not the prompts.
Step 2: build the board in four zones
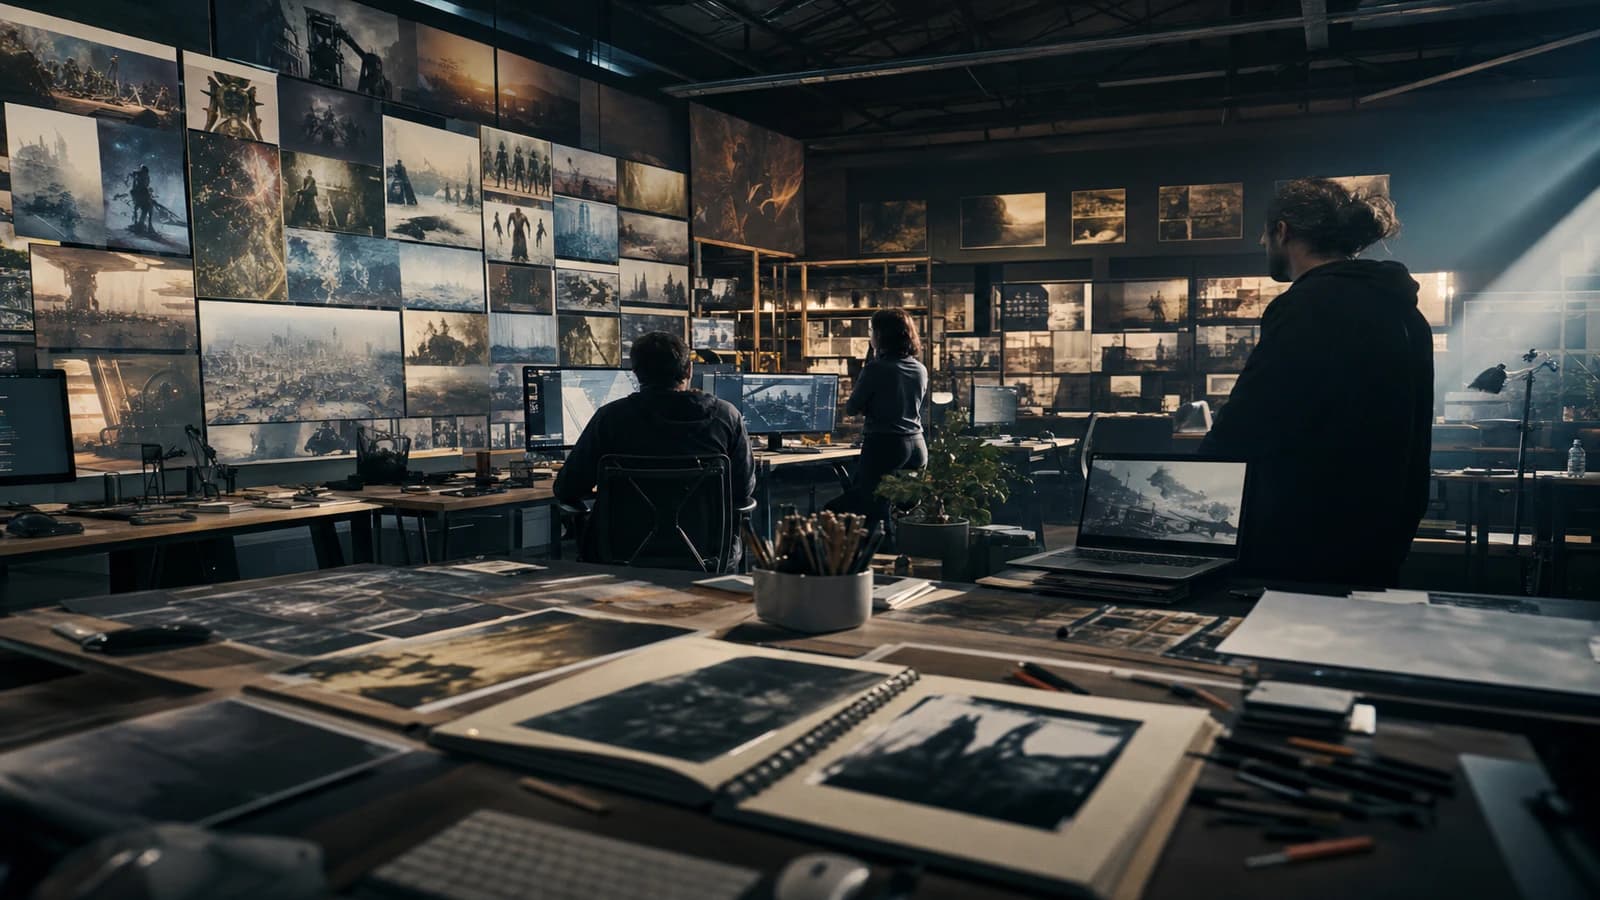
Zone A, light and shadow. Two to three references with annotated arrows. Zone B, framing and focal length. A wide shot, a tight shot, with the focal length written large. Zone C, palette and materials. Zone D, negative. Tools: Figma, Milanote, Notion, even an annotated PDF. The tool matters less than the readability in thirty seconds for someone who did not attend the brief.
Step 3: write the reusable prompt block
From the board, write a base paragraph that you will paste at the head of every generation. Structure: light, palette, grain, focal length, bans. Condensed example: "Office interior, side window key 35mm, natural skin with visible pores, light 16mm grain, blue-gray and warm wood palette, no HDR, no multiple studio reflections." This block is your DNA. The shots change only one variable at a time.
Step 4: test the board on a pilot image
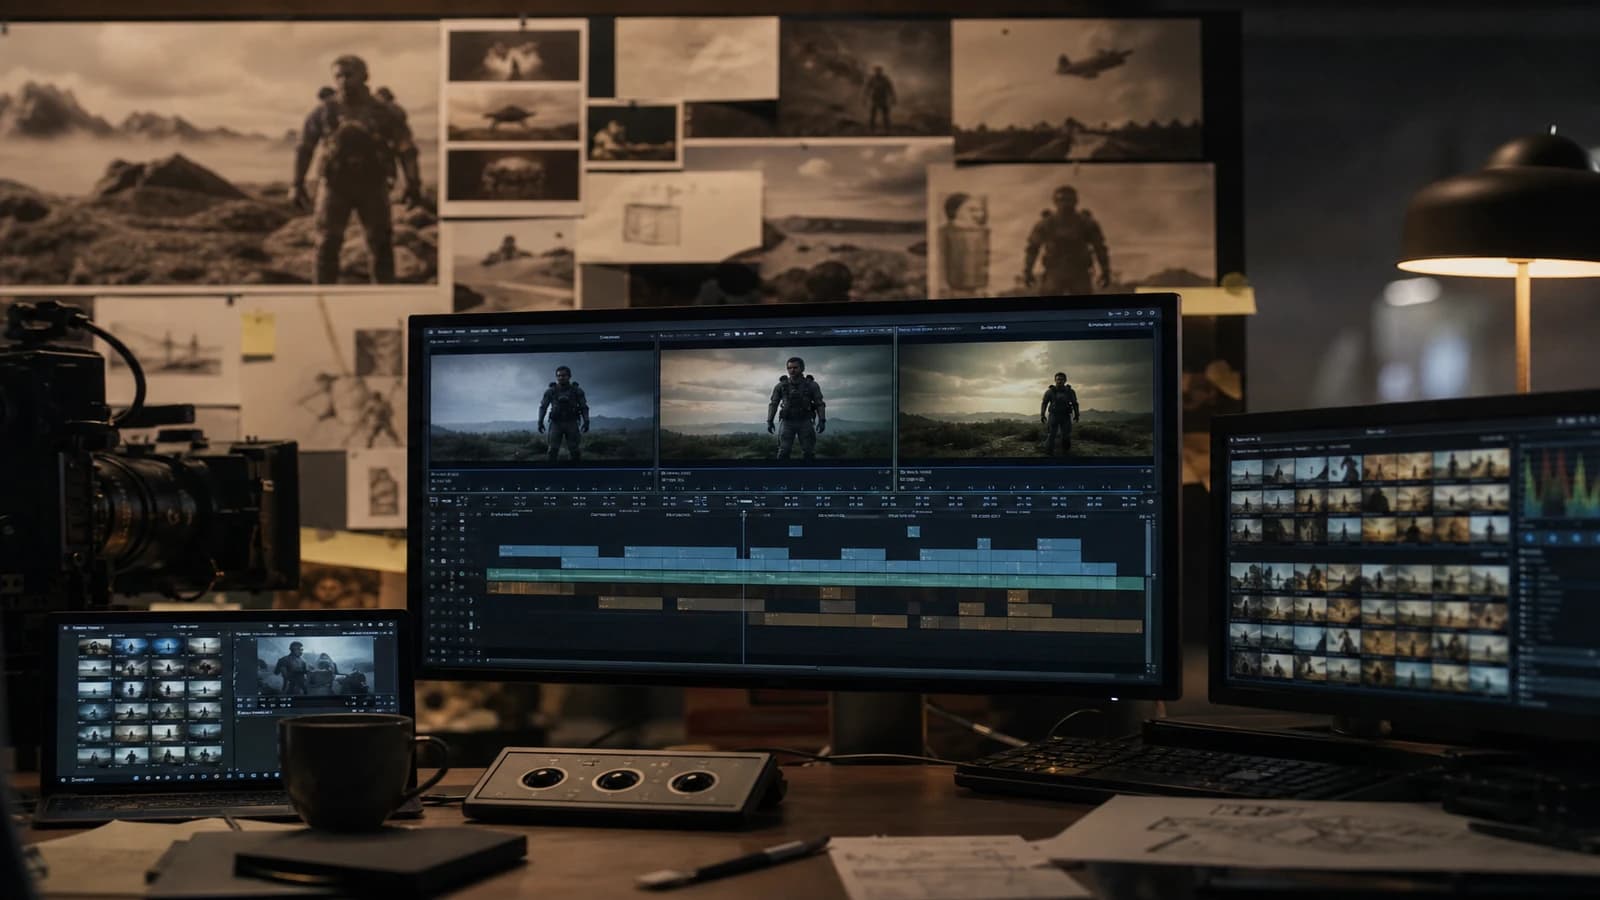
Generate a pilot image. Compare it to the board on a calibrated screen if possible, otherwise on two different screens. Check box by box: light, palette, grain, focal length. If two boxes fail, you change the board or the prompt block, not both at once. One variable per iteration. Otherwise you will never know what saved or broke the take.
Step 5: version and share
Export the board as an annotated PDF plus the prompt block as a .txt. Name it project_moodboard_v01.pdf. When the client approves, freeze the version. "Discreet" tweaks to an approved board are the number-one source of drift at pick-up. For long productions, a Notion bible for film and series hosts the board as a page linked to the prompts and exports.
Scenario A: cosmetic ad, tight deadline
Client brief: "premium, natural, not clinical". You receive references that are too smooth. You build a board with textured skin, a soft side key, an explicit ban on the hospital-white background. Locked prompt block. Six Flux variations, a single 85mm focal length. Delivery in four hours instead of two days of fumbling. The client does not see the board. They see that the six shots look alike.
Scenario B: short film, ten shots, two locations
A board separated by location: apartment day, street night. Each location has its light sentence and its palette. The character has an independent costume sheet. When you generate shot 7, you open the location board, not the global one. Narrative consistency holds because the location rules are actionable, not because you hope the model remembers shot 3.
Scenario C: social content, three formats
The same intention, three crops: 16:9, 9:16, 1:1. The board specifies where the important information lives in each format. The center of gravity rises in vertical. Without that, you crop at random and lose the light that made the reference.
What breaks in production (and how to fix it)
The board is too beautiful to be read. Too many images, no annotation. Fix: cut it to five anchors. Each image has a sentence that says why it is there.
The prompts contradict the board. You noted soft side light but you write "dramatic studio lighting" out of habit. Fix: the prompt block is copy-pasted from the board, not rewritten from memory.
Post-production saves a vague board. An aggressive LUT on shots that do not share the same light. Fix: back to the pilot image. The LUT does not glue different lighting geometries together. See how to grade an AI video in DaVinci Resolve.
The client changes direction without versioning. You add images to the board without removing the old ones. Fix: a new version v02, the old one archived. Otherwise your team mixes two intentions.
The grain disappears on mobile. You validate on a dark screen, the audience sees plastic on a phone. Fix: systematic mobile test. Adjust the grain and contrast before declaring the board approved.
The reflections in the eyes lie. A rectangular catchlight on a "candle only" scene. Fix: harmonize the shape of the source with the set on the board. Small consistency details silence the critical brain.
The board mixes several engines without saying so. You paste a Flux ref and a Midjourney ref without translating the grain difference. Fix: a "target engine" column on the board. If you switch tools midway, you update the prompt block, not just the images.
The annotations are unreadable in a client meeting. Too much jargon, too small. Fix: a PDF export with captions in client language about the emotion and three technical terms maximum per image. Keep the technical version for the team.
From moodboard to shotlist: the bridge everyone forgets
An actionable board does not live alone. It feeds the shotlist shot by shot. Each line of your shot list must point to a board rule: focal length, light, palette, ban. When you write "shot 4: MS night street", you add "board zone B, 35mm, amber neon banned on the face". Otherwise the board stays a decorative PDF while the generation goes back to freestyle.
The shotlist is also when you decide which board references apply to which shot. Not all shots need all rules. A dialogue close-up can ignore the wide architecture rule but must respect the skin and gaze rule. Document those exceptions on the shotlist, not in your head.
In a team, assign a board guardian. One person validates that each new prompt respects the contract before a batch. On a ten-shot short film, that review takes twenty minutes and avoids three hours of regeneration. On an ad with variants, the board guardian compares each export to the pilot still before sending to the client.
When you move to post, the board comes back on the grading screen. That is normal. The board is not only a generation tool. It is the finishing reference. If the generated shot and the board diverge after grading, you correct the shot or you update the board in a minor version, never both without a written trace.
💡 Frank's Cut: keep a negative reference in the board: what you explicitly refuse beats the adjective "cinematic". When a shot goes off the rails, you compare it to the negative box before touching the prompt. It speeds up the diagnosis.
For color theory applied to boards, the DaVinci Resolve Color Management documentation stays a solid base. On the cinematography side, the American Society of Cinematographers site regularly publishes lighting analyses useful for translating an image into instructions, not vibes.
FAQ
Foire aux questions
Réponses rapides aux questions les plus fréquentes sur cet article.
What is the difference between an inspiration moodboard and an actionable moodboard?
An inspiration moodboard shows what pleases you emotionally. It can mix eras, focal lengths and temperatures without issue, because it serves to align the client on a vague direction. An actionable moodboard encodes technical decisions: key direction, dominant focal length, palette with values, recurring materials, a list of bans. Each image of the actionable board must justify a prompt line or a post rule. If an image produces no instruction, it leaves the board or goes to an inspiration appendix. In AI production, only the second type reduces iterations. Many projects need both documents separated: inspiration for the client, actionable for the team. Never mix the two in the same PDF without clear sections, otherwise the client approves an image you cannot reproduce technically.
How many images should an actionable moodboard have?
Five technical images maximum for a sequence or a location, plus a negative zone of two to three counter-examples. Beyond that, the team no longer reads the annotations and you fall back on sorting by feel. Five commented images beat a grid of thirty captures with no hierarchy. For a multi-location project, one board per location with five anchors each. A global board only serves the shared palette and grain, not detailing each set.
Should I use AI-generated images in the moodboard?
Yes, if they are labeled honestly and you document the prompt that produced them. A pilot AI image can become the north reference of a series, on the condition that you freeze the prompt block with it. No, if you mix AIs of different styles without sorting: you import the drift into your own board. Favor real photo references for light and texture, AI references only once you have validated that they respect your rules.
How do I get a moodboard approved by a non-technical client?
Show the board as a PDF with three simple questions: does the emotion match, is it too dark or too bright, does anything explicitly bother you. Do not ask the client to validate the focal length or the Kelvin temperature. Ask them to circle in red what they refuse. Those refusals feed your negative zone. A pilot image generated from the board locks faster than an abstract discussion about the word "premium".
Should the moodboard be updated during production?
Yes, but in named versions, never by silent accumulation. When the story or the brief changes, you create v02, you archive v01, you regenerate a pilot image. Already delivered shots stay on the old documented version. Without versioning, your editor and your colorist apply contradictory rules on adjacent shots. The board is not a decorative poster. It is a living contract with a history.
Which tools for creating an actionable moodboard?
Figma and Milanote work for visual annotation. Notion or a Google Drive folder work for linking board, prompts and exports. The tool matters less than the annotated PDF export shared with the whole team. Avoid Pinterest boards alone with no text layer: Pinterest is a mine, not a deliverable. Always export a dated frozen version you can send to the client and attach to the quote.
How do I connect the moodboard to post-production?
Export from the board a graded reference capture, or an approved pilot still. Paste it on the edge of your screen during grading in Resolve or Premiere. Compare shot by shot: temperature, contrast, skin saturation. The actionable board must contain a sentence on the target grain and the luminance of the skin. Post does not "invent" the look. It brings it closer to the contract. If you have to push a LUT all the way to match the board, the problem is upstream, not in the LUT.
Can I make an actionable moodboard alone without a team?
Absolutely. Solo, the board replaces an art director's review. Write the annotations as if you were reading them six months later with no context. Name the files, version, attach the prompt block. The discipline is the same as in a team. The solo advantage: you can iterate the pilot image ten times before launching a series. The downside: no one challenges you. Do a "wall collage" review: all the thumbnails side by side, the jumps in white balance and temperature jump out.