Luma Dream Machine / Kling: How to Generate Fluid Videos
A complete method to get fluid AI videos with Luma Dream Machine and Kling, with no artifacts or artificial render.
Luma Dream Machine / Kling: How to Generate Fluid Videos
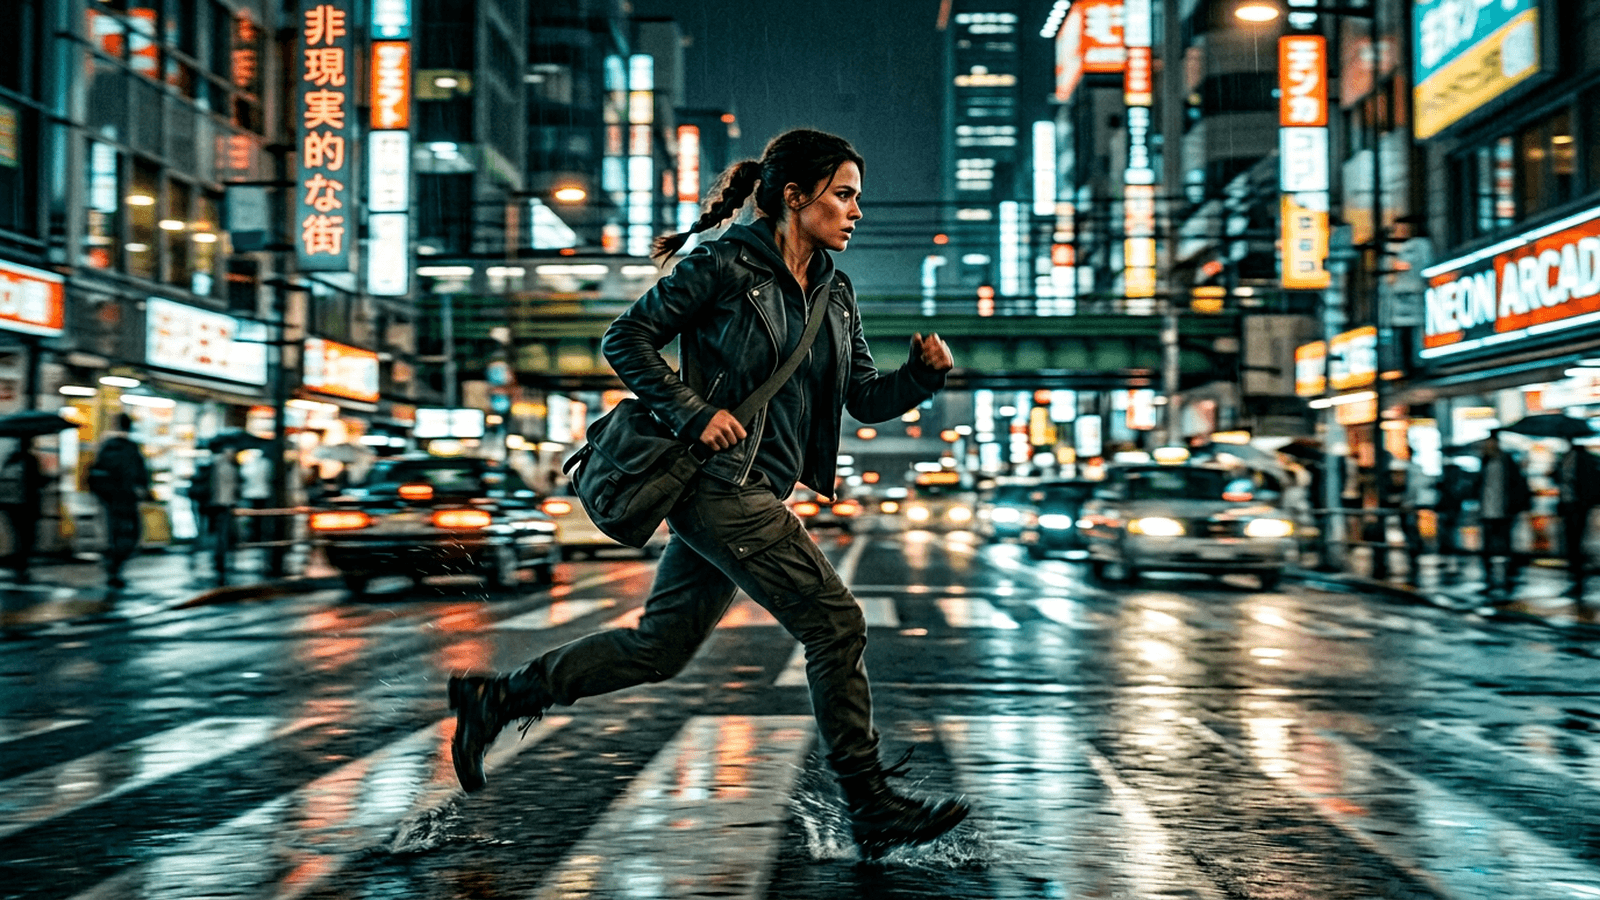
You generate a shot on Luma or Kling. The first second is superb. Then the face drifts, the texture trembles, the movement becomes inconsistent, and everything you saw as "cinema" tips into a technical demonstration. It is the universal frustration of AI video creators in 2026.
The real challenge is not to generate fast. The real challenge is to generate fluid. Fluid means stable over time, readable in the action, consistent in sequence, and credible in the edit. It is exactly there that most workflows fail.
In this masterclass, you are going to learn to use Luma Dream Machine and Kling as production tools, not as "wow" machines. We are going to talk pre-production, prompts, movement control, segmentation, post-production, and multi-support validation.
What "fluid video" really means in production
A fluid video is not a video "with no defect visible at first glance". It is a video that keeps its consistency over several seconds, then over several shots. This nuance is essential.
The first fluidity criterion is the continuity of the subject. Face, silhouette, material, proportions. If the subject changes subtly on each frame, the visual trust collapses.
The second criterion is the movement logic. The camera and the scene elements must move according to a clear intention. A too-floating or erratic movement immediately breaks the realism.
The third criterion is the atmosphere consistency. Light, contrast, texture, depth. Even with good movement, inconsistent atmosphere variations make the sequence artificial.
The fourth criterion is the edit integration. An isolated fluid shot that is impossible to edit together stays a weak shot.
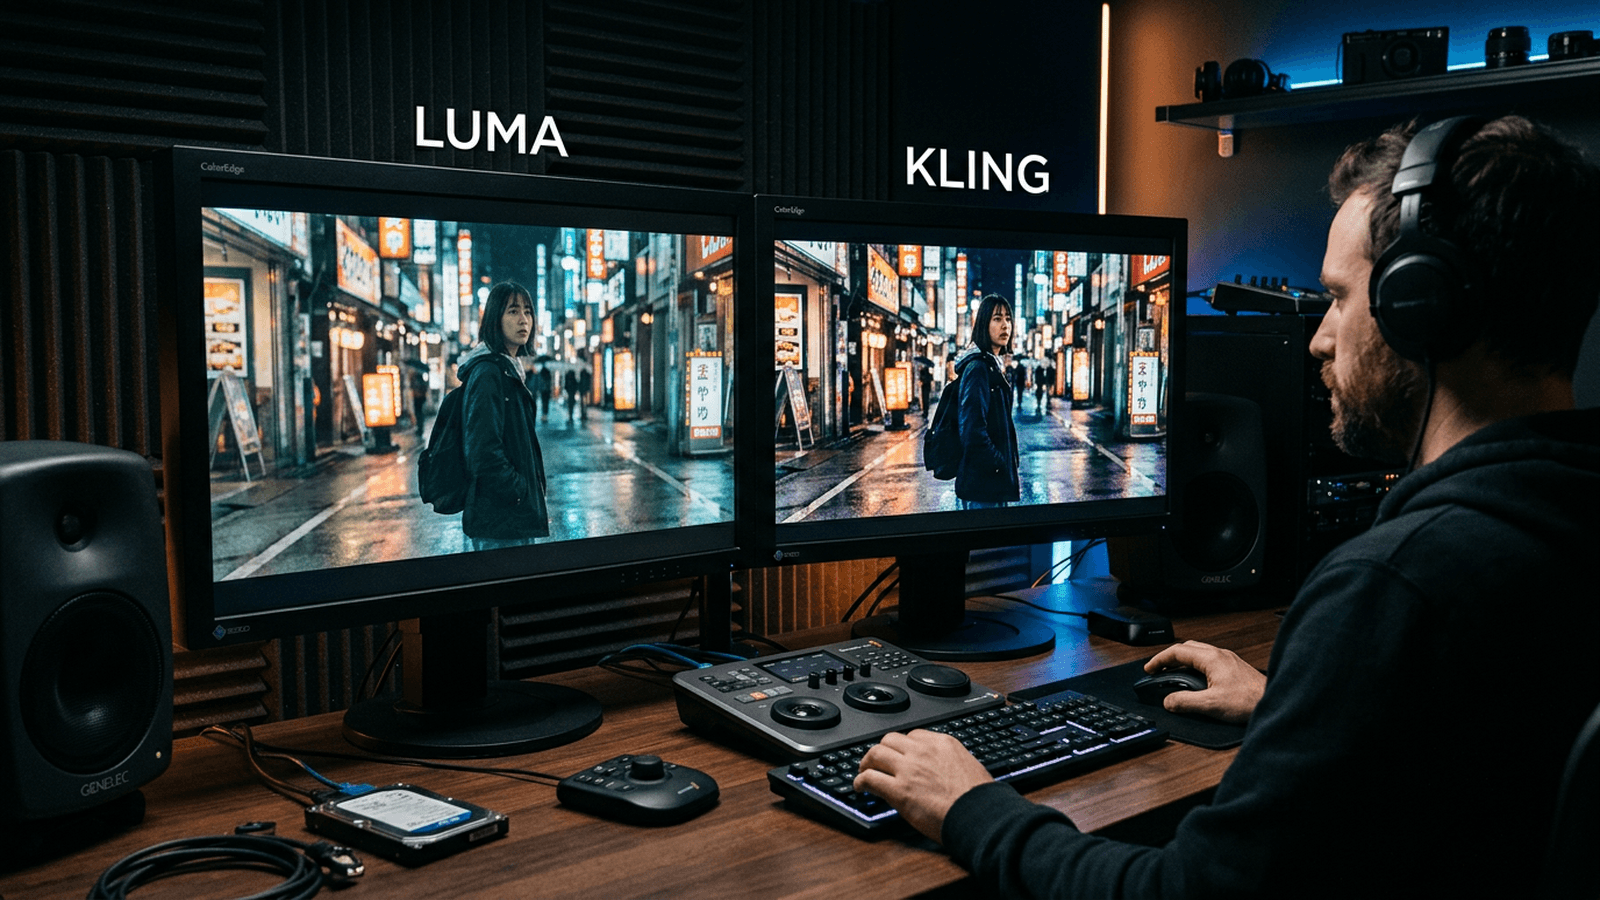
Luma vs Kling: field strengths and limits
Luma Dream Machine often shines on organic atmospheres and enveloping movements. It is very interesting for artistic clips, atmospheric shots, and fluid visual textures.
Kling is often strong on certain more ambitious movement dynamics, with high potential on sequences where the physics of displacement matters.
The field reality is simple: neither of the two is "magic". They require a strict direction and a clean pipeline to produce a real broadcastable sequence.
The right choice depends on your use: previz, clip, ad, short narrative, or direction tests. You must choose the tool according to the deliverable, not according to the hype.
Trench workflow to produce real fluidity
Step 1: lock the master images
Before launching a video, generate stable master images. Subject, light, setting, texture. If your image base is weak, the video amplifies this weakness.
Prepare 3 to 5 references per scene, no more. You want continuity anchors, not a museum of options.
Then set the non-negotiables: light direction, camera distance, skin/fabric material, global palette.
Document these points in a mini scene document. This step avoids the drifts during the iterations.
Step 2: generate short segments
It is the most important rule: work in short segments of 2 to 6 seconds. Longer, more fragile.
A short segment gives you control, reduces the correction cost and eases the edit assembly.
Test three movement intensities: low, medium, high. The "high" version often impresses in preview, but the "medium" version wins in the edit.
Keep the retained versions with a strict naming (S03_P02_v4_luma). With no naming, you quickly lose your progression.
💡 Frank's Cut: if a shot starts to drift after the 3rd second, cut it before the drift. The viewer does not see the cheat, they feel the fluidity.
Step 3: controlled-movement-oriented prompts
Write simple and physical prompts. Subject, action, camera, light, prohibitions. Avoid too-abstract formulations.
Example of logic:
- Clear subject and action.
- Measured camera movement.
- Explicit light source.
- Realistic texture.
- Exclusion constraints.
Change only one variable per iteration. It is the only way to really learn the impact of each adjustment.
Step 4: assemble into a sequence early
The truth test is the sequence. Quickly assemble your segments on a timeline with temporary sound.
Check:
- visual consistency from one shot to another
- energy progression
- spatial readability
Then correct by priority: subject, light, rhythm, then stylization.
Step 5: finishing to fluidify the perception
Even with good segments, the perceived fluidity depends on the finishing. Mandatory pass in editing and grading.
Unify the color and the global texture. The micro-tint gaps between segments create a "patchwork" effect.
Add a consistent sound design. The sound stabilizes the temporal perception.
Finally test on mobile and desktop. The fluidity must hold in both contexts.
For a robust pipeline, connect this method with our complete guide on the Flux models, our visual continuity protocol, our complete AI clip editing workflow, and our grading method for AI videos.
Comparison table: Luma vs Kling by goal
| Goal | Luma Dream Machine | Kling | Recommendation |
|---|---|---|---|
| Organic atmosphere | Very good | Good | Luma first |
| Dynamic movement | Good | Very good | Kling first |
| Fast preview | Very good | Good | Luma for exploration |
| Demanding narrative sequence | Good | Good to very good | Test both on the same scene |
| Broadcastable final render | Yes with finishing | Yes with finishing | Hybrid pipeline recommended |
Practical cases: three productions analyzed
Case 1: 20-second performance-oriented ad
The need: fast hook, product readability, immediate fluidity.
Winning workflow: short segments, simple transitions, stable product shot in the center.
Luma works well for the atmosphere opening. Kling can help on certain more marked movements in the demonstration phase.
The trap is to over-stylize the whole. In advertising, the clarity of the message comes first.
The best render comes from a sober edit with a strong visual hierarchy.
Case 2: social-first music clip
The need: energy, texture, style consistency, music-aligned cut rhythm.
Here, Luma often gives very good visual materials for the immersive passages. Kling can complement on dynamic tipping moments.
The key is to repeat visual motifs instead of piling up different ideas.
In the edit, cut on the musical accents. Do not let the generated duration dictate the final rhythm.
Case 3: short narrative sequence
The need: character continuity, setting consistency, emotional progression.
In this context, the pre-production discipline becomes critical. You must lock the visual bible before the generation.
Then, treat the shots like a real shot breakdown: anchor shot, tension shot, resolution shot.
This staging logic strongly reduces the narrative artifacts.
Troubleshooting: the mistakes that kill the fluidity
Mistake 1: too-long shots. Fix: segment.
Mistake 2: too-ambitious camera movement. Fix: reduce the amplitude.
Mistake 3: contradictory prompts. Fix: simple structure.
Mistake 4: no sequence test. Fix: assemble early.
Mistake 5: absent finishing. Fix: grade + sound + multi-support validation.
Advanced use cases: producing fast without degrading the consistency
Case A: 15-second product presentation sequence
You have to show a product from several angles in a very short time. The main need is the readability: material, shape, perceived value. Here, the fluidity is not only technical. It is commercial.
The method consists of preparing a stable opening shot, two detail shots, then a message-oriented closing shot. Luma can handle the atmospheric opening very well. Kling can be useful on the more assertive movement shots.
The trap is to ask for too much gestural complexity around the product. The simpler the action, the more the perception of quality rises.
You then have to harmonize the textures between shots. In advertising, a material variation between two cuts can break the trust immediately.
Case B: storytelling sequence for a YouTube capsule
Here, you are not selling a product, you carry a narration. The fluidity becomes narrative: tension progression, breathing, resolution.
You can use Luma for the atmosphere shots and Kling for the dynamic tipping moments. The important thing is to clearly define the function of each shot.
If you let the tool dictate the duration of each segment, you lose the editorial rhythm. The edit must take back control.
Add a guide voice or a provisional sound design very early. The narrative reading of a sequence changes a lot with the sound.
Case C: previz of a client scene before a real shoot
In this case, the deliverable is not "final broadcast". The deliverable is a decision. You must make a staging intention understood quickly.
The winning workflow consists of producing short segments per intention: camera placement, light mood, global rhythm.
Do not look for photorealistic perfection. Look for direction clarity. Clients validate a readable intention better than an overloaded aesthetic.
After validation, you can switch to a more robust pipeline for the final version.
Advanced prompting for Luma and Kling
The basic mistake is to write "poetry" prompts. What works better are operational prompts oriented toward camera action.
Recommended structure:
- Main subject + action.
- Shot distance.
- Precise camera movement.
- Dominant light source.
- Texture and atmosphere.
- Explicit prohibitions.
This structure helps you keep a constant language between iterations.
Example of stable prompt logic
- Subject: woman walks slowly.
- Frame: waist shot, slight frontal axis.
- Camera: very soft push-in.
- Light: cold side source.
- Texture: fine grain, natural skin.
- Prohibitions: no face morphing, no over-sharpness.
The strength of this method is the reproducibility. You know what you are testing and why.
Steering the fluidity: useful metrics
You can measure the fluidity quality instead of "feeling" it. This discipline avoids the session biases.
Metric 1: rate of shots kept after sorting.
Metric 2: average duration before drift appears.
Metric 3: number of edit corrections per shot.
If the retention rate is low, your prompting must be simplified. If the drift appears early, reduce the action complexity and the segment duration.
This steering lets you improve your workflow week after week.
Editing and post-production: stabilizing the perception
A fluid sequence is also built in post. The micro-gaps of tint, contrast and texture between segments are often responsible for an "unstable" impression.
Pass 1: global color alignment.
Pass 2: local correction of the fragile shots.
Pass 3: addition of a subtle homogeneous grain.
Then, integrate the sound as a temporal glue. A consistent atmosphere and transition sound points reinforce the perceived fluidity.
Finally, validate on the complete timeline. The still-image test is not relevant to judge the video fluidity.
Team organization for continuous production
As soon as you work with several people, the consistency can break fast. You must define a simple system.
Role 1: visual direction (bible, master prompts).
Role 2: generation (iterations and selection).
Role 3: finishing (editing, grading, sound).
With this separation, everyone optimizes their scope without breaking the global vision.
Add a short daily review to realign the direction and avoid the style drifts.
Decision table: which complexity according to the deadline
| Deadline | Recommended complexity level | Main focus | Risk to avoid |
|---|---|---|---|
| 24h | Low to medium | Readability + rhythm | Overloading the prompts |
| 48-72h | Medium | Sequence consistency | Multiplying the styles |
| 1 week+ | Medium to high | Narration + finishing | Endless perfectionism |
This table helps you stay realistic and deliver on time.
Final checklist before publication
- Continuous reading with no visible break.
- Subject consistency on all the key shots.
- Light/color consistency between segments.
- Mobile + desktop test.
- Sound-image validation together.
- Final export + project archive.
This checklist is your quality safety net.
30-day progression: moving from tester to producer
Week 1: master simple prompts and short segments.
Week 2: assemble consistent micro-sequences.
Week 3: integrate grading and sound design.
Week 4: deliver a complete broadcastable mini-project.
This progression forces you to finish projects, and it is the only way to really learn.
The level does not come from a perfect prompt. It comes from a produce, correct, publish loop.
Budget, deadlines, and prioritization: producing fluid in the real
In a real project, you never have infinite time to iterate. You must prioritize the high-impact shots and simplify the rest. It is a universal production rule.
The best strategy consists of classifying the shots into three levels: hero, support, transition. The hero shots receive more generation and finishing time. The support shots stay sober. The transitions serve the continuity.
In practice, this hierarchy strongly reduces the costs and improves the global perceived quality. The viewer mostly remembers the strong well-mastered shots.
Add a safety margin in the planning for the fragile shots. Luma and Kling can require additional iterations according to the movement complexity.
Simple load estimate per shot type
| Shot type | Generation time | Correction time | Drift risk |
|---|---|---|---|
| Hero shot | High | High | Medium |
| Support shot | Medium | Medium | Medium |
| Transition shot | Low | Low | Low |
This estimate helps you steer the project without drowning in exploration.
Art direction: maintaining a strong identity from one shot to another
Technical fluidity is not enough if the visual identity changes during the sequence. You must maintain a consistent art direction, especially on short videos where each shot counts.
Create a mini but strict bible: dominant palette, light type, texture density, contrast level, camera-movement style. This bible fits on one page.
Then, compare each new generation to this bible before validation. If a shot is beautiful but outside the visual DNA, it leaves.
It is this filter that turns a series of AI shots into a credible directing sequence.
Final client validation: a method to avoid late feedback
Late feedback often arrives because the initial validation was too fuzzy. You must secure explicit checkpoints.
Checkpoint 1: intention validation (global style).
Checkpoint 2: raw sequence validation (rhythm and consistency).
Checkpoint 3: finishing validation (grading, sound, export).
With these three checkpoints, the expectations are clear and the feedback becomes actionable.
When you present a version, accompany it with a short note: what is final, what is provisional, what can still evolve. This transparency reduces the misunderstandings.
Operational conclusion: fluidity is a discipline, not a preset
If you remember one thing, remember this: fluidity is born from a system. Prepare, segment, test, assemble, unify. Each step counts as much as the chosen tool.
Luma and Kling can produce excellent shots. But with no method, they mostly produce surprises. With method, they become solid bricks of your creative pipeline.
At this level, you no longer "launch generations". You direct sequences. And it is precisely this change of posture that makes the difference between standard AI content and truly professional video.
Useful external references
You can go deeper with Luma, Kling, and the workflow guides of Frame.io Insider.
FAQ
What is the main difference between Luma and Kling for a beginner?
Luma is often more immediate to explore visual atmospheres and soft movements. Kling can be interesting when you want to push more marked dynamics. For a beginner, the right choice is the one that lets you reproduce a stable result several times.
Why do my videos seem fluid in preview but fake in the edit?
Because the perceived fluidity is judged in sequence, not in an isolated shot. In preview, a shot can seem convincing. In the edit, the style, light or movement gaps between shots become visible. The solution is to assemble early and correct by priority.
What segment duration do you recommend?
In practice, 2 to 6 seconds per segment give the best control. It limits the temporal drifts and simplifies the corrections. Then, you assemble the segments to build the final sequence.
Can you release a pro video without going through post-production?
Very rarely. Even with good generations, you have to unify the color, adjust the rhythm and work the sound. The post-production turns AI segments into a consistent and broadcastable video.
What is the biggest trap in fluid video generation?
Confusing generation speed and production quality. Generating fast is useful, but with no strict direction and sequential validation, you accumulate beautiful but incompatible shots.
How to know that a sequence is ready to publish?
When it holds on three tests: continuous reading with no perceived break, multi-shot visual consistency, and mobile/desktop validation with integrated sound. If these three tests pass, the sequence is generally ready.