Pika Labs: A Tutorial for Fast Text-to-Video Generation
A complete masterclass to use Pika Labs in fast text-to-video, with a pro workflow, useful settings and consistency control.

Pika Labs: A Tutorial for Fast Text-to-Video Generation
You want to go fast. You open Pika Labs, you type a prompt, you get a video in a few seconds. It is exhilarating. Then you look closer: faces that drift, camera movement with no logic, soft transitions, style that changes from one shot to another. It is exactly what blocks the creators who move from the fun test to serious production.
Here's the thing: Pika is excellent for speed. But raw speed is not a directing strategy. If you want to produce credible videos for a clip, an ad, premium social content or film previz, you must impose a method. The goal is not to generate a lot. The goal is to generate usefully.
In this guide, you are going to learn a fast but controlled text-to-video workflow: prompt framing, intelligent iterations, visual control, defect correction, then edit integration. You move fast, but without falling into the "AI demo" render.
What Pika Labs does very well and what it will not do for you
Pika Labs is formidable to produce visual variations quickly. You can test an atmosphere, a movement, a transition, a texture in a few minutes. For ideation and the first sequence blocks, it is a very efficient weapon.
Pika is also useful for short formats where the immediate visual impact counts: reel hooks, clip intros, ad teasers, stylized transitions. Its main gain is the short "idea → render → adjustment" loop.
But Pika does not replace the art direction. If you do not lock your universe, it will give you seductive but mutually inconsistent results. It does not replace the narrative edit either. A series of beautiful shots is not a story.
The good approach is therefore hybrid: Pika to generate fast, you to direct, select, assemble and finalize. It is this combination that produces a pro render.
Fast pre-production: what you must define before the first prompt
Most beginners launch Pika too early. They think they save time, but they then lose it in chaotic corrections. You must set a mini brief before generation.
Recommended minimal brief:
- Emotional intention of the sequence.
- Target duration.
- Type of shots needed.
- Light/color palette.
- Desired realism level.
- Final use (social, ad, clip, film).
This brief fits in 8 lines, but it protects you against the dispersion.
Then, define a light visual bible: subject, setting, texture, dominant movement. You can reinforce this step with our complete guide on the Flux models, our visual continuity protocol, our complete AI clip editing workflow, and our grading method for AI videos.
Trench workflow: generating fast without sacrificing the quality
Step 1: start with a simple and controlled prompt
The first prompt must not "ask for everything". You aim for a stable base. Subject, main action, type of shot, light, texture. It is enough.
Example of prompt logic: "waist shot, single character, slow walk, warm side light, urban night background, light camera movement, organic realistic render." This format stays readable and iterable.
Avoid piled-up adjectives. The more you add contradictory qualifiers, the more the result becomes random.
Generate 3 to 5 variations max on the same base. You compare while keeping objective criteria: readability, consistency, edit potential.
Step 2: iterate by single variable
A classic mistake is to change prompt, style, movement and atmosphere at the same time. You no longer know what improves what.
The pro rule is simple: one variable per iteration. Example: you keep everything identical and you modify only the camera movement. Then you test only the impact of this variable.
This method seems slow, but it is in reality faster because it builds a stable understanding of the tool.
You document each kept version with a short note. At the end of the session, you have a usable log, not a chaotic folder.
💡 Frank's Cut: if an iteration seems "incredible" but cannot integrate into the sequence, it is a creative test, not a production shot.

Step 3: structure the shots into a micro-sequence
You do not judge Pika shot by shot, you judge it in sequence. Quickly assemble 3 to 6 shots on a raw timeline.
Check three things:
- style consistency between shots
- energy progression
- understandable transitions
If a sequence does not "read" with no explanation, the problem is often in the structure, not in the beauty of an isolated shot.
Then work on the pivot shots: opening, shift, exit. They are the ones that give the feeling of mastery.
Step 4: correct the defects before they accumulate
The most frequent defects with Pika:
- face distortion at the end of the shot
- unstable gestures
- texture break between two generations
- too-"floating" camera movements
Fast correction:
- shorten the shot before the drift.
- simplify the requested action.
- harmonize the color in the edit.
- add a bridge shot if necessary.
What counts is the perceived fluidity of the final sequence.
Step 5: finishing to produce a broadcastable video
Pika gives you the material. The finishing gives the credibility.
Mandatory pass in editing for:
- cut rhythm
- consistent transitions
- visual cleanup
- sound design
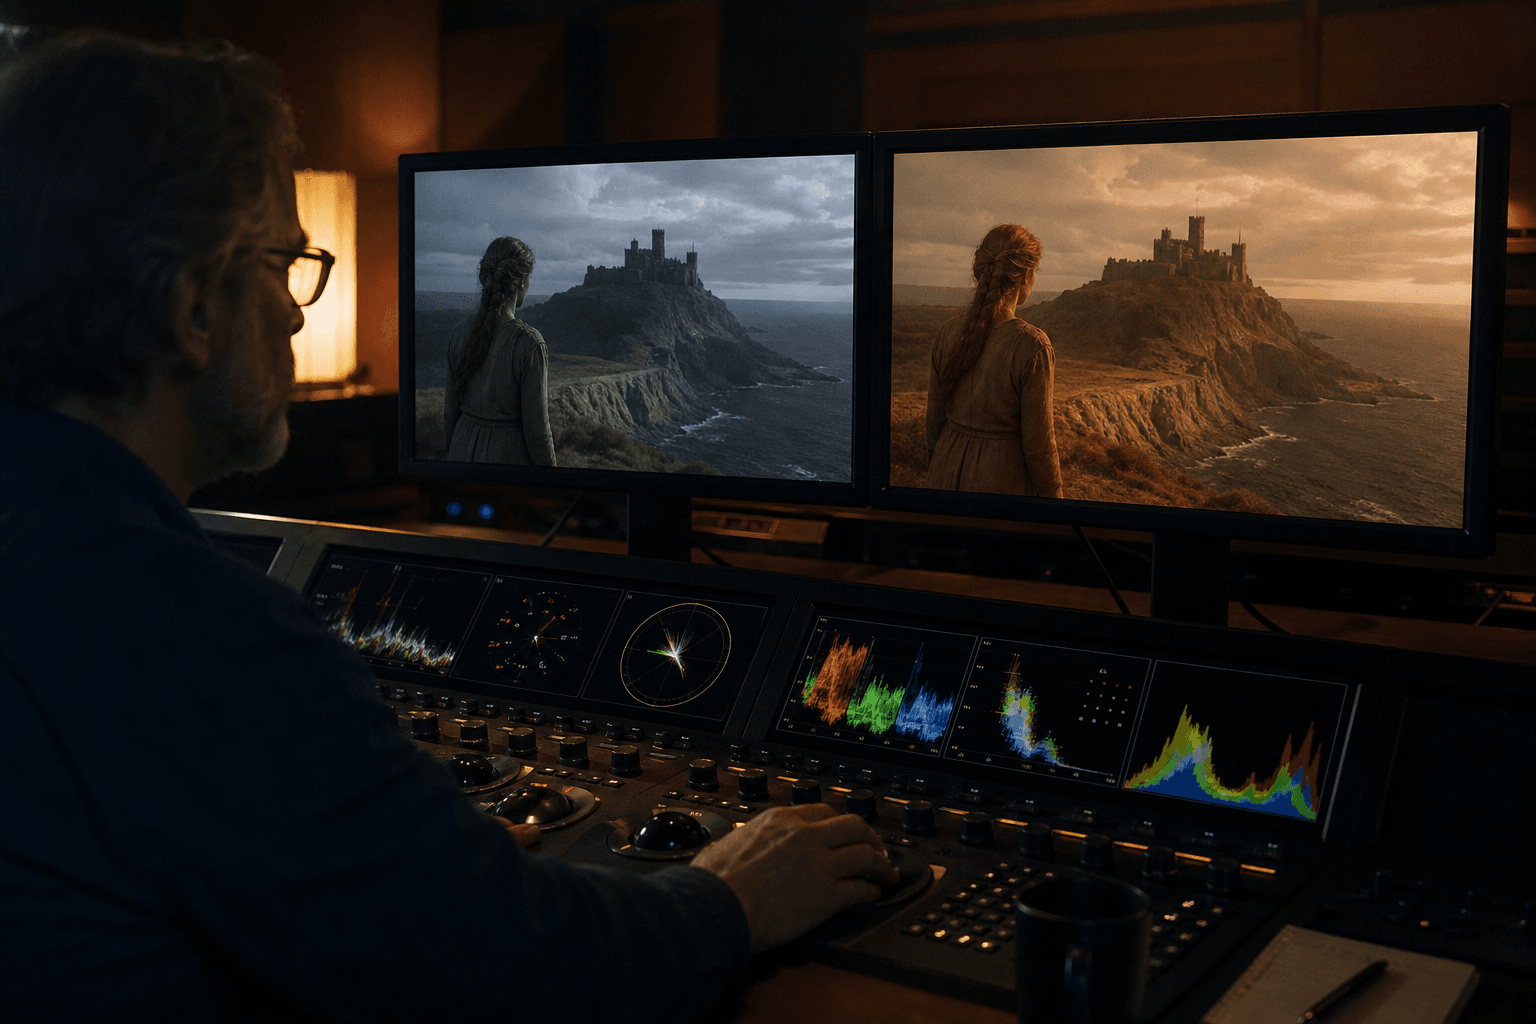
Then, unify the color of the whole. A Pika sequence can contain slight tint gaps from one shot to another. The grade corrects this problem.
Finally, test on mobile. If the shot holds on a small screen, it will hold better elsewhere.
Practical cases: three uses where Pika is particularly useful
Case 1: 20-second teaser for a product launch
You have to produce fast, with a tight budget, but a premium render. Pika excels here, especially if you build a short sequence with a strong visual intention.
The winning workflow:
- 1 hook shot
- 2 proof shots
- 1 CTA shot
You generate several versions of the hook, then you lock the rest around the best hook. It is simple, efficient, and result-oriented.
The trap is to over-stylize the middle of the sequence. Stay readable, especially in advertising.
Case 2: social-first music clip
On a short clip, Pika lets you quickly test visual textures aligned on the rhythm. You can iterate in a loop with the music in the background.
Here, the most important is the mastered repetition of visual motifs. Two strong well-repeated motifs are worth more than ten disjointed ideas.
You can also generate section transitions (verse → chorus) that are very efficient if you stay sober on the movement.
The final edit decides everything: align your cuts on the musical accents, not on the automatic end of the generations.
Case 3: scene previz for a pitch
You have to sell a staging idea to a client or a producer quickly. Pika is very useful to make a clear previz in little time.
The goal is not the image perfection. The goal is to communicate camera axis, atmosphere, rhythm, and narrative progression.
You generate short representative shots, then you assemble them with temporary sound. The pitch gains impact immediately.
This type of use is perfect to speed up the decision before a heavier production.
Comparison table: speed vs control on Pika
| Use mode | Initial speed | Sequence consistency | Creative control | Distribution quality |
|---|---|---|---|---|
| Spontaneous generation with no method | Very high | Low | Low | Low |
| Structured prompt + targeted iterations | High | Good | Good | Good |
| Structured prompt + edit + grade + sound | Medium | High | High | High |
| Versioned pipeline + multi-support QA | Slower at the start | Very high | Very high | Very high |
Troubleshooting: what beginners break the most on Pika
Mistake 1: too-loaded prompts. Fix: simple prompt, clear goal.
Mistake 2: multiple changes per iteration. Fix: one variable at a time.
Mistake 3: validation on an isolated shot. Fix: test in micro-sequence.
Mistake 4: keeping the shots too long. Fix: cut before the drift.
Mistake 5: neglecting the sound. Fix: minimal sound design from V1.
Real scenarios: how Pika behaves according to the contexts
Scenario A: social ads campaign with ultra-short deadlines
You need to deliver several video variations in 48 hours. In this context, Pika can be formidable, provided you lock a production method from the start. The trap is to launch dozens of prompts with no system and end up with a magnificent but unusable folder for advertising.
The method that works consists of preparing a clear matrix: 3 hooks, 2 atmospheres, 2 CTAs. You generate short blocks per combination, then you select strictly according to readability and conversion potential. The gain comes from the structure, not the quantity.
Then, you protect the brand consistency with a fixed visual palette, a dominant movement, and a homogeneous sound treatment. With no that, each variation seems to belong to another campaign.
Finally, you validate in mobile viewing with low sound. It is in this real condition that the best hooks reveal themselves.
Scenario B: artistic clip with a strong visual identity
Here, the goal is not only the readability. You want a signature. Pika is useful to quickly explore movement textures and original visual transitions.
The key is to iterate on recurring motifs rather than changing style on each shot. Two or three strong well-declined motifs produce a consistent universe.
The danger is the excess of effects. If each shot tries to impress, the narration disappears. Keep zones of visual breathing.
The final edit must support the musical rhythm and not the generation order. This point is critical for a professional render.
Scenario C: previz for a non-technical client
For a client who has to validate a direction quickly, Pika can create convincing previz in a few hours. It is not the final version, but it is a proof of direction.
You then produce a short sequence with key shots: opening, middle, conclusion. The goal is to communicate the intention, not to finalize each detail.
Add a narration or a minimal guide text to ease the client reading. A previz with no context can be misinterpreted.
After validation, you go back to a controlled production with a complete pipeline. This step avoids costly back-and-forths at the end of the project.
Advanced prompting: writing for Pika without blurring the result
The prompt quality in text-to-video rests on the clarity of the information blocks. A useful prompt must contain: subject, action, camera frame, light atmosphere, texture, constraints.
Example of structure:
- Main subject.
- Main action.
- Type of shot and movement.
- Light atmosphere.
- Realism level.
- Elements to avoid.
This structure lets you iterate cleanly without breaking the base.
The most important is the stability of the constant terms. If you completely reformulate on each attempt, you lose the continuity.
Mini library of useful commands
- "keep the subject's visual identity"
- "light and stable camera movement"
- "no face morphing"
- "realistic light, moderate contrast"
- "organic texture, no artificial sharpness"
These simple formulations give better results than overloaded prompts.
Selection method: how to choose fast without going wrong
When you generate a lot, the selection becomes the real bottleneck. With no evaluation grid, you keep "impressive" but useless shots.
Adopt a five-criteria grid:
- Narrative readability.
- Visual consistency.
- Movement stability.
- Edit potential.
- Sound compatibility.
Score each shot out of 5. Keep only the shots with a high global score. This method removes the emotion from the decision and increases the final quality.
Then, do a 30-second sequence review to check the fluidity. It is the most important validation.
Editing workflow: turning Pika clips into a real video
A good Pika output is a raw material. The edit decides the perceived quality. You must therefore assemble early, cut early, correct early.
Start with a raw timeline with music or atmosphere. Place the shots according to intention, not according to generation order.
Then, adjust the duration of each shot to avoid the end drift. Many Pika shots are excellent at the start then become fragile.
Add bridge shots to smooth the style or movement breaks. These shots are often worth more than heavy transitions.
Finish with a unification color pass and a minimal sound design. Even light, this finishing changes everything.
Performance and productivity management
The promise of Pika is the speed, but speed can create chaos with no process. You must structure your sessions to keep a real output.
Work in short cycles: generation, sorting, assembly, correction. Avoid the infinite generation sessions with no edit.
Prepare prompt presets per use: ad, clip, teaser, previz. This library strongly reduces the startup time.
Archive the best versions with explicit names. You build a reusable system instead of starting from scratch every week.
Decision table: when to use Pika, when to go elsewhere
| Need | Pika alone | Pika + edit | Advanced pipeline recommended |
|---|---|---|---|
| Social hook 10-20s | Yes | Better | Optional |
| Ad teaser 20-45s | Limited | Yes | Depending on the requirement |
| Clip 1-2 min | Risky | Yes indispensable | Often necessary |
| Film previz | Yes | Yes | Depending on the client |
This matrix helps you stay pragmatic. The right tool depends on the deliverable, not on the hype of the moment.
Final validation before distribution
Before publication, apply a three-pass validation:
Pass 1, global viewing with no pause for narrative consistency.
Pass 2, technical control on sensitive zones (faces, edges, transitions).
Pass 3, multi-support test (desktop, mobile, low sound).
If the video holds these three passes, you are ready to distribute.
If a pass fails, correct locally before relaunching a massive generation. This discipline protects your time and your quality level.
Team organization: how to keep the consistency when you are several
As soon as several people touch the prompts and the sequences, the consistency can collapse very fast. The best antidote is a very simple shared frame.
Define a style owner, an edit owner, and a QA owner. Even in a small team, these roles clarify the decisions.
Create a common folder with validated prompts, kept versions, and rejection notes. It avoids the duplicates and the direction conflicts.
Plan a short daily review. Fifteen minutes are enough to realign the heading and avoid a multi-hour drift.
Measuring the real performance of a Pika workflow
Many creators judge Pika on the beauty of a few outputs. In production, you must measure the global output.
Indicator 1: rate of shots kept after sorting.
Indicator 2: average time to get a consistent micro-sequence.
Indicator 3: number of post-generation corrections needed.
If these indicators stagnate, your problem is rarely the tool. It is often the prompting or selection method that must evolve.
Tracking these metrics helps you progress objectively instead of depending on an impression.
4-week progression roadmap
Week 1: learn structured prompts and efficient sorting.
Week 2: build consistent 15 to 30-second sequences.
Week 3: integrate sound + grade + multi-format exports.
Week 4: produce a publishable mini project with real constraints.
This progression moves you from "AI test" mode to "creative production" mode.
At the end of the month, you must be able to repeat your workflow without starting from scratch.
Useful external references
To go further, work with Pika, the guides of Runway Learn, and the workflow analyses of Frame.io Insider.
FAQ
Is Pika Labs suited to a complete beginner?
Yes, it is even a good entry point for fast video generation. The interface is accessible and the iteration loop is short. But to get a really pro render, you have to impose a strict method: structured prompts, controlled variations, sequential validation and finishing in post-production.
What shot length to aim for to avoid the drifts?
For a reliable use, the segments of 2 to 6 seconds are generally the most stable. The longer the shot, the more the risk of temporal artifacts increases. Better assemble several consistent short shots than a single too-ambitious shot.
Can you make a whole clip only with Pika?
Yes, it is possible, especially for short and stylized formats. But the final quality strongly depends on the edit, the grading and the sound. Pika can produce a solid visual material, but the narrative consistency stays a human job.
Why do my results change a lot from one generation to another?
Because you probably modify too many variables at once, or because your prompt is too vague. The stability comes from a clear base, a locked style and controlled iterations. Documenting the winning versions helps a lot.
What is the biggest trap in fast text-to-video?
Confusing speed and final result. Generating fast is useful, but publishing with no control often gives an inconsistent render. The real pro workflow consists of generating fast, selecting hard, finishing cleanly.
Which indicator shows that a Pika sequence is ready to distribute?
When the sequence stays readable and credible with no explanation, in continuous reading, and it holds on several screens with a clean mix. If it passes this triple test, it is ready.