Runway Gen-3 tutorial: animating a still image for a film shot
Detailed method to animate a still image with Runway Gen-3 with no artificial render or distortions.
Runway Gen-3 tutorial: animating a still image for a credible film shot
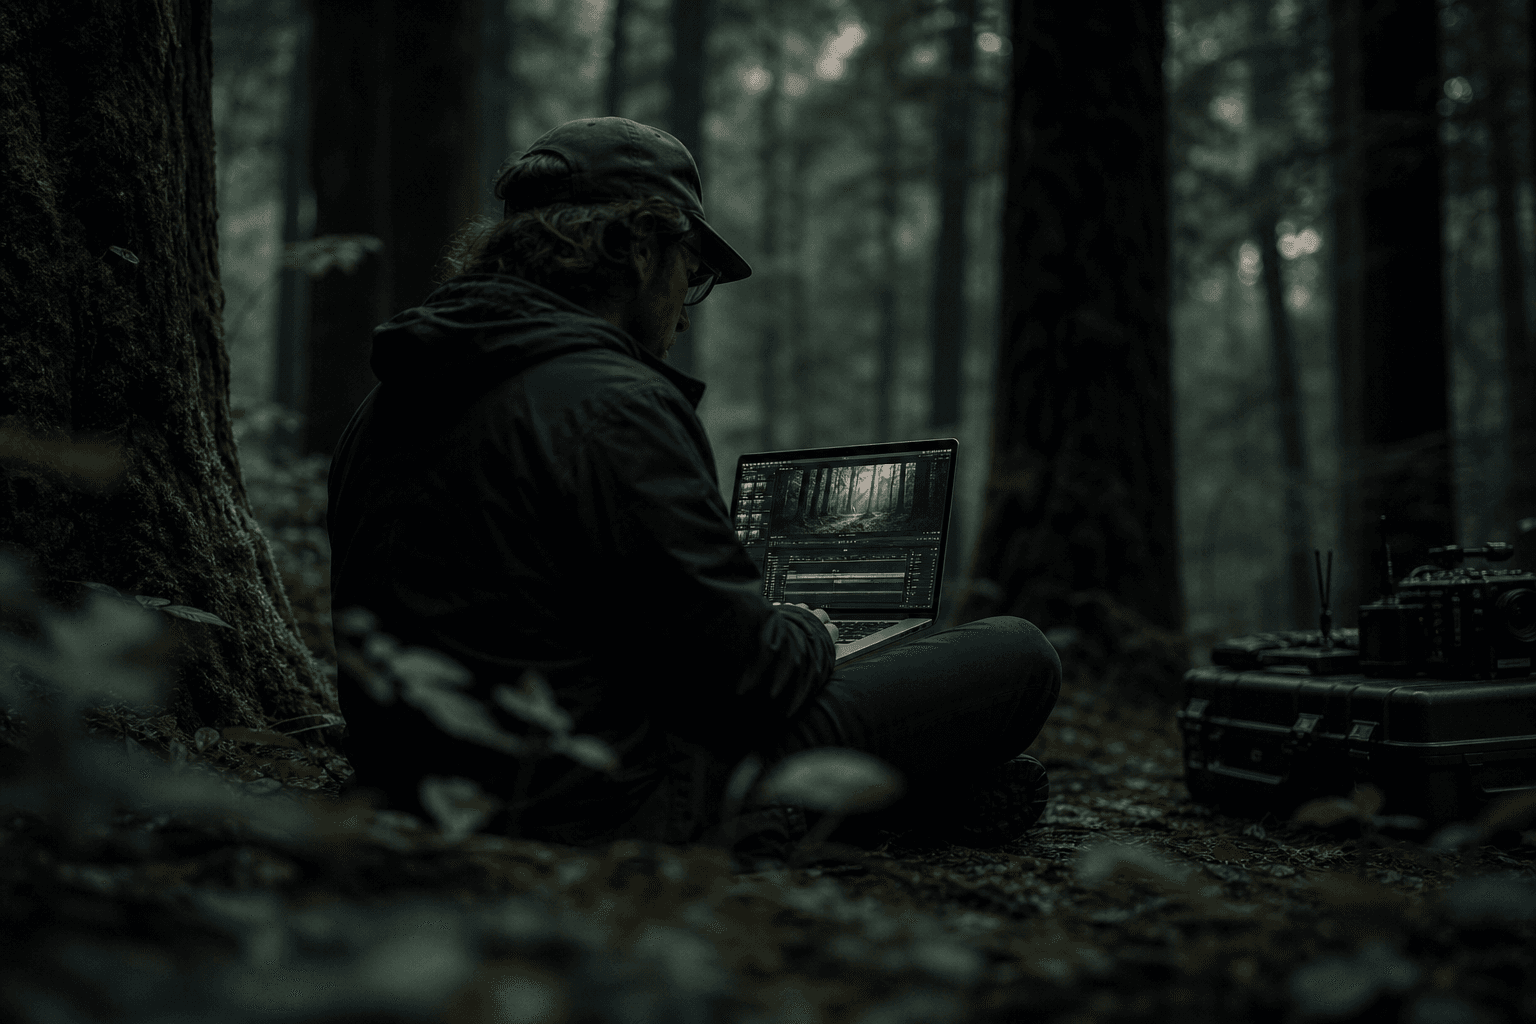
You generate a superb still image. Spotless light, strong framing, cinema texture. Then you animate it in Runway Gen-3 and, in three seconds, it goes off the rails. The hands melt, the edges breathe, the background slides, and your shot looks like an AI demo rather than a film shot. If that happened to you, it is normal. The problem is not your talent. The problem is the method.
Animating a still image with a credible render requires a discipline closer to VFX than to "free prompting". You must prepare the source, limit the movements, generate in passes, then validate in an editing context. Without this frame, even the best images turn into fragile shots.
In this Runway Gen-3 tutorial, I give you a field routine to produce usable shots, not Instagrammable tests. We are going to see how to secure your images, write useful prompts, fix the drifts, then integrate the result into a sequence that holds.
Core concepts: what makes a Runway Gen-3 animated shot hold
First concept, stability prevails over ambition. Beginners want a spectacular movement too soon. Result, the scene distorts. In practice, a discreet, clean, well-integrated movement is worth ten times more than an artificial travelling that breaks at the end of the clip.
Second concept, the source image is your 80 percent. If your source contains ambiguous zones, confused hands, fused hair, inconsistent depth of field, the animation amplifies these defects. Runway does not invent a clean structure from a fragile base.
Third concept, a single movement intention per test. "Light push-in" or "soft lateral drift" or "micro handheld". Not all at once. Contradictory prompts create seductive results in preview, then unstable in real playback.
Fourth concept, the value of a shot is judged in sequence. An isolated shot can look incredible and yet destroy the match with the before/after shots. The final test is always done in a full timeline.
Fifth concept, the sound influences the perception of realism. An imperfect movement can become acceptable with a good audio integration. Conversely, a visually correct shot can seem false with no suited ambiance. On this point, our AI voice-over and dubbing guide remains a useful base.
| Runway Gen-3 shot type | Goal | Recommended movement | Frequent risk | Priority fix |
|---|---|---|---|---|
| Emotional portrait | Intensify presence | very light push-in | face distortion | reduce amplitude + duration |
| Ambiance shot | Bring the frame to life | soft lateral drift | inconsistent parallax | simplify the visual depth |
| Object insert | Narrative accent | micro focal movement | unstable edge | reinforce local source sharpness |
| Tension shot | Create controlled instability | discreet handheld | frame-edge artifacts | limit jitter and duration |
The trench workflow: complete method to animate cleanly
Start with a simple question. What is this shot for? Establish a place, reinforce an emotion, make a transition, create tension? If you do not have this answer, you risk animating for the effect, not for the story.
Then, prepare a source image dedicated to the animation. You clean the fragile zones, clarify the depth planes, and ensure a readable light. A source thought for the animation gives much more robust results than a "just beautiful" image.
Third step, generation in passes. Subject stability pass, camera movement pass, controlled creative variation pass. This progression lets you understand what breaks and fix locally without redoing everything.
Fourth step, immediate edit integration. You place the shot between its neighbors, adjust duration and rhythm, then decide go/no-go. This quick control avoids accumulating technically beautiful but narratively useless shots.
Step 1: prepare the source image like a filmed shot
You must treat your still image like a "virtual set". Check the readability of foreground/subject/background. If everything is on the same detail level, Runway struggles to produce a coherent movement.
Clean the zones known to break. Fused fingers, unstable hair edges, ambiguous teeth, small texts, contradictory reflections. These details often explode during the animation.
Avoid too-loaded compositions for the first tests. The more fine elements in motion, the higher the artifact probability. Start simple, then add complexity.
If you aim for a coherent render on a complete scene, link this step to a global continuity logic. Our guide on AI matching mistakes will help you stay on course.
Step 2: write a useful movement prompt
A good Runway prompt for a still image is not a novel. It is a clear staging instruction. Main subject, type of movement, intensity, rhythm, stability constraint. That is all.
Mental example: "slow subtle push-in, subject remains stable, background gentle parallax, cinematic natural motion". This type of request often gives more reliable results than a prompt overloaded with adjectives.
Test one variable at a time. If you change movement, style, and intensity in the same pass, you no longer know what broke. The progression becomes random.
Document each test quickly. Version name, intention, result, main defect. This mini log saves you enormous time when you have to retake under a deadline.
Step 3: generate in passes and fix with no panic
Pass 1, subject stability. You check the face, the posture, the critical edges. No ambitious movement here. Just make sure the heart of the shot holds.
Pass 2, camera movement. You add the chosen displacement with a moderate amplitude. If it breaks, go back, lower the intensity, shorten the duration, and retest.
Pass 3, controlled creative variation. You can introduce an extra micro-life, a visual breath, a light variation. But only if the first two passes are solid.
When a version fails, do not try to "save" it at all costs. Going back to a stable base is often faster and cleaner than fixing an already shaky shot.

💡 Frank's Cut: a clean 3-second shot always beats an 8-second shot that degrades. Cut shorter, gain credibility.
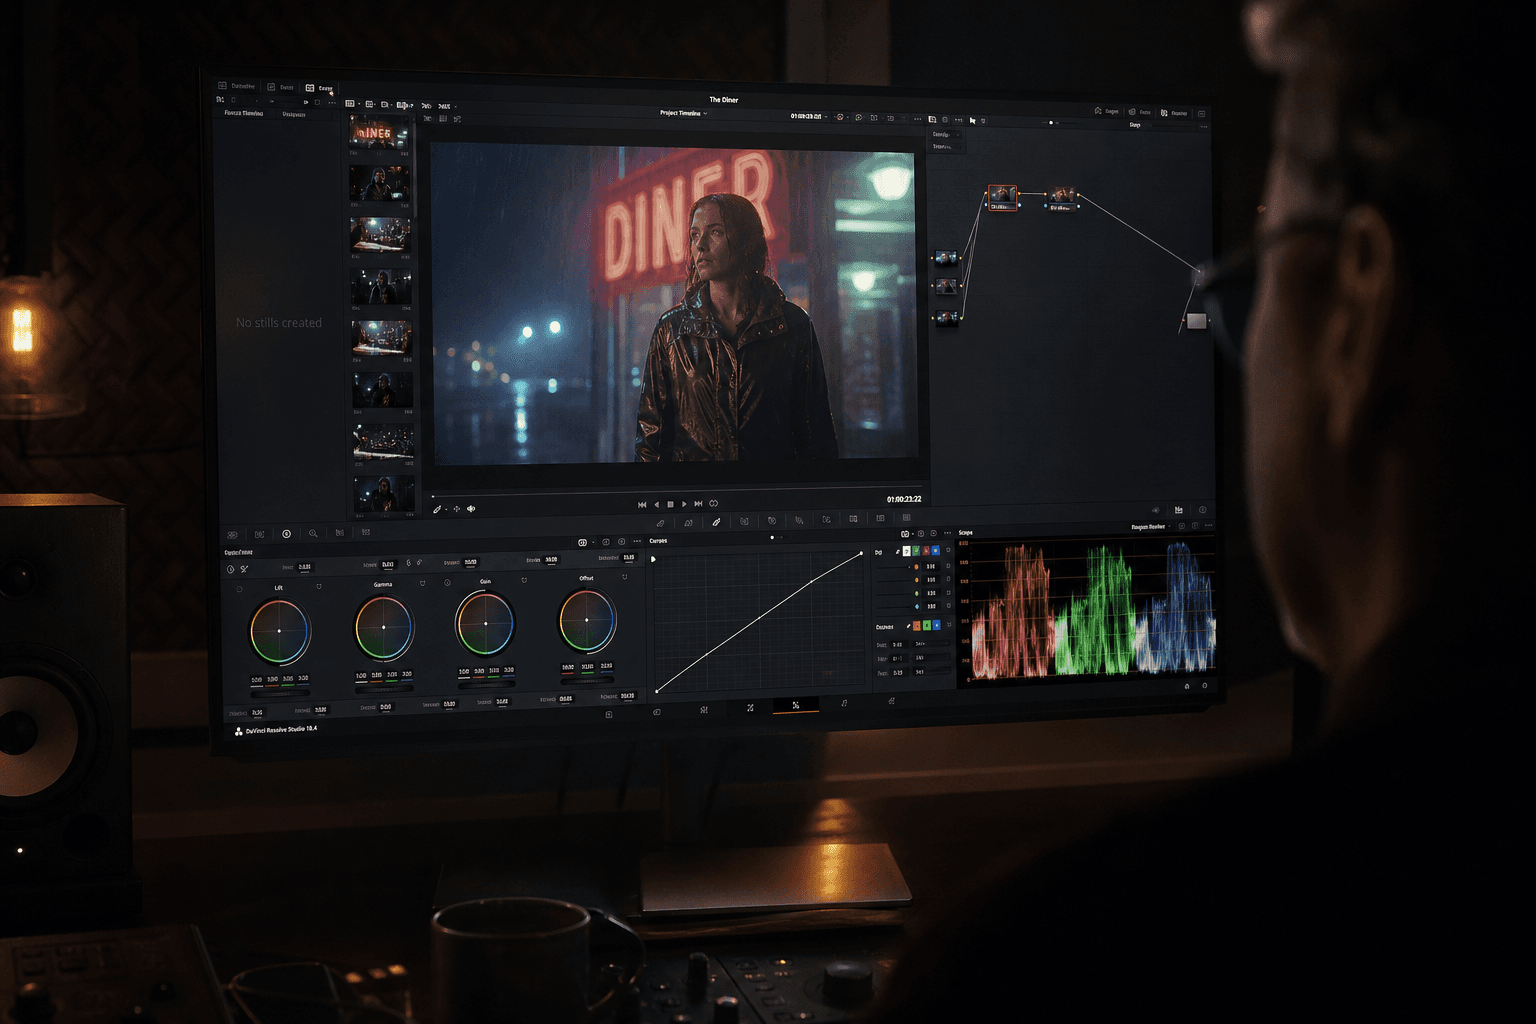
Step 4: integrate into the timeline to validate the real render
Place your shot between the real shots of the sequence. Watch the cut in and out points. The movement artifacts often show there, not at the center of the shot.
Adjust the duration according to the hold of the shot, not according to your initial wish. Many AI shots are excellent over 2.5 to 4 seconds and fragile beyond. Accept this reality, it is a pro choice.
Then watch in full screen, then on mobile. Some edge defects appear differently depending on the compression and the display size.
Finally, validate with a minimal sound layer. Ambiance + breathing + light impact. A shot is evaluated in full audiovisual language, not in isolated visual.
Step 5: build a reproducible production routine
The real gain comes from mastered repetition. Create a "safe" working preset, an "ambitious" preset, and a go/no-go checklist. You avoid starting from scratch on each shot.
Work in batches of similar shots. Same type of framing, same movement intention, same visual complexity. This logic increases the stability of your results.
Set up a quick end-of-session review: what holds, what breaks, what must be simplified. This learning loop transforms your tries into real progression.
To keep the consistency of these animated shots in a larger film, our AI-assisted video editing guide perfectly complements this workflow.
Another useful reflex is to categorize your animated shots into three risk levels. Level 1: stable shot, readable subject, minimal movement. Level 2: shot with complex depth or fragile zones. Level 3: shot with critical interactions, hands, hair, text or marked movement. This classification helps you decide where to invest time and where to stay sober.
Also think in terms of an internal library. Keep validated examples of shots that work, with their generation parameters and their editing context. When you start a new project, this base saves you enormous time and limits the useless tries.
Finally, document the useful failures. Yes, the failures. A well-annotated "bad test" avoids reproducing the same mistake the following week. It is one of the habits that really make creators progress.
Field cases: three real scenarios where Runway Gen-3 changes the game
Scenario 1, emotional transition between two scenes. The project needed a bridge shot between a calm interior and a tense night street. Instead of shooting an additional shot, we animated a still image of a threshold with a light drift and a controlled light variation. The result allowed to smooth the transition with no rhythm break. The key was not the spectacular effect. It was the precision of the movement and the short duration.
Scenario 2, portrait shot for a teaser. The source image was very strong, but each aggressive animation attempt distorted the features. By going back to an ultra sober approach, discreet push-in, face stability prioritized, we got a perfectly usable 3-second shot. This decision reinforced the presence of the character instead of distracting with artifacts.
Scenario 3, urban ambiance shot with complex depth. The first renders produced an inconsistent parallax on the architecture lines. The fix was to simplify the depth reading before animation, then to reduce the movement speed. In post, a light harmonization of the grain and the contrast finished the integration.
These three cases show the same lesson: with Runway Gen-3, the elegance often comes from restraint. You do not need to prove the shot is animated. You must make people forget it is.
Delivery checklist for a Runway Gen-3 animated shot
Before validating a shot, apply a strict checklist. First question: does the main subject stay stable over the whole useful duration? Second question: is the movement readable with no overacting? Third question: do the fragile zones, hands, edges, teeth, hair, stay credible?
Then, check the sequence consistency. Does the shot enter naturally after the previous one? Does it exit cleanly toward the next one? If you have to hide the matches with artificial transitions, it is often a weakness signal.
Then move to the multi-support verification. What holds in local preview can break on mobile after compression. Test at least an intermediate export in the targeted distribution conditions. It is a simple step that avoids the bad publication surprises.
Finally, control the narrative hierarchy. Does the shot support the story or draw the attention to its technique? If the answer is "you see the effect too much", shorten, simplify, or replace. The film wins when the technique puts itself at the service of the story.
Last set tip: always do a "fresh viewer" pass. Come back a few hours later, watch the sequence without stopping, and note the three moments where your eye exits the story. Very often, these moments reveal a too-pushed movement, a weak temporal match, or a slightly excessive shot duration. This cold rereading is one of the simplest ways to transform a technically acceptable shot into a truly cinematographic shot.
Keep this ritual on each project, even a short one. It is a discreet habit that quickly raises your directing level.
Troubleshooting: frequent mistakes and exact fixes
Mistake number one, too aggressive movement. The shot distorts at the end of the run. Fix: reduce amplitude, shorten duration, go back to a single movement.
Mistake number two, unstable subject. Face or hands "melt". Fix: improve the source image on fragile zones, prioritize the stability pass, simplify the action.
Mistake number three, sliding background. Non-credible parallax. Fix: clarify the visual depth, limit the drift, avoid too-detailed background textures.
Mistake number four, shot superb alone but bad in sequence. Fix: validate in the timeline from the first passes, adjust rhythm and match.
Mistake number five, over-iteration. Too many versions, no more clear decision. Fix: fixed go/no-go criteria and a short test log.
Mistake number six, final export too compressed. The artifacts become visible. Fix: check the export pipeline and test an intermediate render before distribution.
To reinforce the technical bases around animation and postproduction, consult Runway Learn, the DaVinci Resolve documentation, and the resources of No Film School. These references are useful to keep a pro level beyond the prompting.
💡 Frank's Cut: when you hesitate, always favor the most stable shot. The viewer forgives the sobriety, he does not forgive the distortion.
FAQ: essential questions on Runway Gen-3 to animate a still image
-
How long should an animated shot from a still image last?
In most cases, 2.5 to 4 seconds give the best stability results. Beyond that, the drift risk increases, especially on sensitive zones like the face, the hands and the fine backgrounds. It is not an absolute artistic limit, but a frequent technical reality. You can extend some shots with good results, but you need very clean sources and very controlled movements. In practice, a solid short shot beats an unstable long shot. -
Why do my hands distort when I animate an image with Runway?
The hands are a structurally fragile zone for the video models. If the source is ambiguous, the animation amplifies the error. First check your image base: distinct fingers, readable edges, clear light. Then, reduce the movement amplitude and avoid stacking several camera intentions. Finally, do a stability pass before adding any creative variation. This working sequence clearly increases the reliability on the sensitive anatomical zones. -
What type of movement is the safest to start?
The light push-in and the discreet lateral drift are the most stable to begin. They create a feeling of life without forcing the structure of the shot. Complex or combined movements, like rotation + translation + marked handheld, quickly increase the artifact risk. Start simple, master the quality, then add complexity progressively. This path saves you time and gives you usable shots faster. -
How to know if a shot is really ready for the final edit?
A shot is ready when it holds on three tests: isolated playback, playback with before/after shots, and playback on at least two supports (main screen + mobile). You must check the stability of the critical zones, the consistency of the movement, and the absence of visible defects after compression. Add a light audio test to judge the real integration in the scene. If the shot passes these tests with no perceptible discomfort, it is generally ready. -
Do you need a lot of variants to find a good result?
Not necessarily. Too many variants with no frame makes you lose time. Better 3 to 5 targeted tests with one variable modified at a time than an avalanche of renders impossible to compare. Define a clear intention, test, note the result, decide, then move forward. This production discipline is more efficient than infinite exploration, especially when you work under a delivery constraint. -
How to integrate a Runway shot with real filmed shots?
The key is the consistency: rhythm, texture, contrast, and movement dynamics. Quickly place the animated shot in the real timeline and adjust its duration so it "breathes" with the neighboring shots. In postproduction, harmonize color and grain to reduce the visual signature gaps. The sound also helps a lot to smooth the transition. The goal is not to hide the origin of the shot, but to avoid it breaking the continuity of the scene. -
What to do when a shot is almost good but breaks at the end?
Cut before the degradation. It is often the best solution. You can also retry a shorter version with a more moderate movement. Many creators insist on "saving" the last seconds and end up deteriorating the whole. In cinema language, a clean and brief shot is stronger than a longer technically doubtful shot. Accept the constraint as a staging choice. -
What weekly routine to progress quickly on Runway Gen-3?
Do two 90-minute sessions per week. Session 1: image preparation + 3 movement tests on the same shot. Session 2: timeline integration + fixes + comparative export. Note what works and what breaks. In four weeks, you build reliable reflexes and a base of practical presets. The progression comes from structured repetition, not from the permanent search for new isolated tricks.