How to Generate a Realistic Scene with Depth of Field
Plane separation, consistent bokeh, subject-set distance, and post to soften the transitions.
Depth of field is not a "blurry background" switch. It is a relationship between focal length, focus distance, aperture (or its conceptual equivalent in your tool), and scene geometry. When one of these variables lies, the viewer does not always know why the image "looks AI", but they feel that the blur does not follow the laws of the gaze.
This guide helps you describe a scene where the sharp-to-blur transition is homogeneous, where the subject stays readable, and where the bokeh does not look like a blurred layer laid behind a sharp cutout. We stay on formulations usable in a prompt and visual checks afterward.
You can use it as a session framework: ten minutes to write the geometry, ten minutes to generate three variants, ten minutes to choose and note. This cadence avoids the enthusiasm where you click for an hour with no criterion.
The marketing vocabulary around the generated image often promises "instant" results. Here, we start from the opposite principle: slowness with criteria beats speed with no criteria. Your eye improves when you know what you are comparing.
What the brain expects from blur
In the real world, blur progresses with the distance from the focus plane. Transitions too abrupt between a sharp cheek and a "cream" wall at fifty centimeters break the reading. The out-of-focus highlights have a shape linked to the optics: round, oval, cat-eye toward the edges depending on the lenses.
When you generate an image, if you give no distance, the model invents a decorative blur. If you give contradictory distances, it mixes several bokeh styles in the same frame. Consistency takes priority over intensity: a consistent moderate blur beats an inconsistent extreme blur.
For portraits where the face carries all the attention, how to create an AI portrait worthy of a film complements this text with subject-oriented framing and light choices.
Focal length, distance, and fields
A longer focal length compresses the space and often isolates the subject better on a busy background. A wide focal length shows the environment but makes the background blur less dramatic at equal distance. It is not a hierarchy of value: it is a tool.
Write explicitly: camera at so many meters from the subject, subject at so many meters from the relevant background, camera height, horizon line if exterior. Even approximations like "two meters / six meters" orient the model better than "shallow depth of field" alone.
For the light that sculpts the volume and avoids the flat, how to create natural light in an AI image stays a healthy base: a wide window as a key gives understandable shadow transitions on the face and on the background blur.
Three scenarios
Interior portrait, window, readable room background. You want to separate the subject without melting the set into mush. Describe a moderate blur, a realistic depth of field for a 50mm at medium distance, and a background with a few light points to draw a clean bokeh.
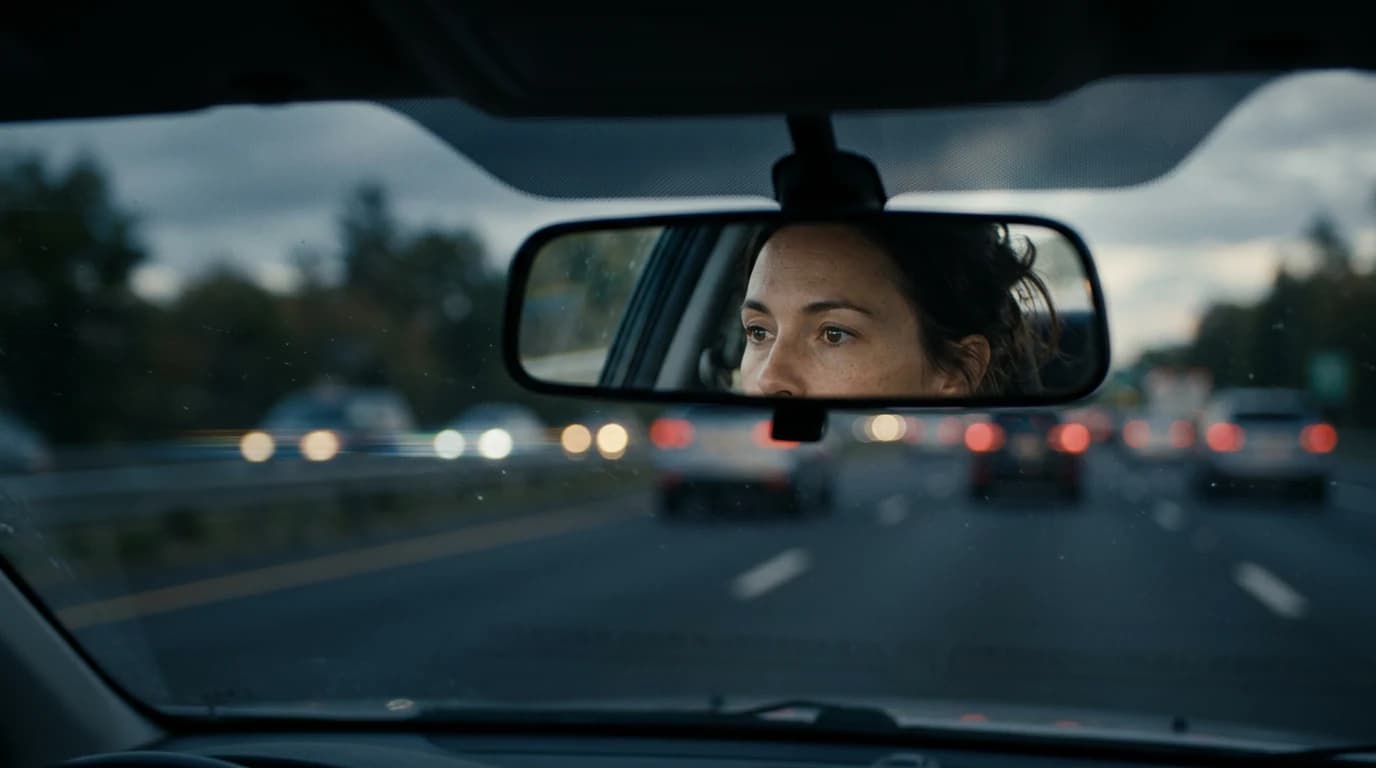
Night with neons. You own a more assertive bokeh. The distant sources become light bubbles. The face must keep a structure: side key, shadow under the nose, no symmetric postcard-studio catchlight. You avoid putting neons behind the head with no minimal fill: otherwise the outline gets eaten and the blur looks like a composite halo.
Table with glasses and bottles. The multiple reflections create highlights that must share the same blur behavior. Otherwise you read a collage. Simplify the number of visible glasses if the model saturates.
Dark scene with one lamp. Here, the depth also reads through what stays in the black. If you blur everything including the important shadows, you lose the geometry. How to create a dark, cinematic mood with AI helps keep a light anchor on the subject while the background falls back.
Practical workflow
Step 1: a geometry sentence
Who is in the foreground, where the camera is, where the main focus plane is, what the first important background layer is.
Step 2: choose the optics family
Spherical 35 / 50 / 85 or an owned anamorphic look. Do not mix the signals if you do not need to.
Step 3: describe the bokeh by shape and behavior
Soft highlights in the blur, no dirty halos on the sharp edges, no "cutout".
Step 4: generate three variants
Same geometry, three light adjustments. Choose the one where the sharp-blur transition is the softest.
Step 5: light post if needed
A very light Gaussian blur on the background can save an almost-good scene. Avoid attacking the subject.
Step 6: if the scene goes to video
Document the focal length and distances in a text file. How to get a cinema render with Seedance 2 reminds us that movement reveals inconsistent depth.
Before animating, check the edges of the subject on two mental frames: does the hair sticking out have a clean transition? Does the ear not "smoke" into the background? These details often explode when the camera moves, even slightly.
50mm spherical, eye level, subject 1.8m from camera.
Background shelves and window lights 4m+ behind subject.
Shallow depth of field, smooth falloff, natural circular bokeh.
Skin texture natural, subtle pores, no plastic retouching.
Negative: cutout edges, double edges, warped perspective, text.
35mm, wide interior, subject mid-ground sharp, foreground table slightly softer.
Practical lamp in deep background as bokeh shapes, not blown highlights.
Negative: HDR glow, duplicated catchlights, cartoon CA.
Lighting hierarchy and perceived depth
With no light hierarchy, the blur looks like an effect laid on a flat image, even if the prompt promises "cinema" without saying where the light comes from or at what distance the gaze actually reads. A clear key, a controlled fill, a background that has the right to be dark or noisy: the depth reads also in the local contrasts. When everything is lit the same way, even an expensive bokeh does not save the scene.
The reflections and shiny surfaces create highlights that must share the same blur style as the rest of the background. If a reflective zone stays hard while everything else melts, you get a collage.
Multiple shots and depth consistency
When you chain two images of the same scene, the viewer compares the blur rate and the position of the focus plane. If the subject advances half a meter without the background changing behavior, the series lies. Note for each shot: camera-subject distance, subject-background distance, virtual focal length. These three numbers or sentences are enough to align a session.
If you change the virtual focal length between shots with no narrative reason, you simulate a lens change in the middle of a continuous take. Sometimes it is intended; often it is a prompt mistake. Own the choice or stay stable.
Busy interiors: furniture, shelves, windows
A living room with shelves, plants, and a window can produce a magnificent bokeh or a chaos of small discs that compete with the face. Reduce the number of distinct light sources in the background if the face loses the hierarchy. A practical lamp at the back can be enough to carry the depth with no ten LEDs of different colors.
The horizontal shelf lines create repetitive transitions that read as artifacts when the blur is badly interpolated. A simpler background is not cowardice: it is a focusing of the gaze.
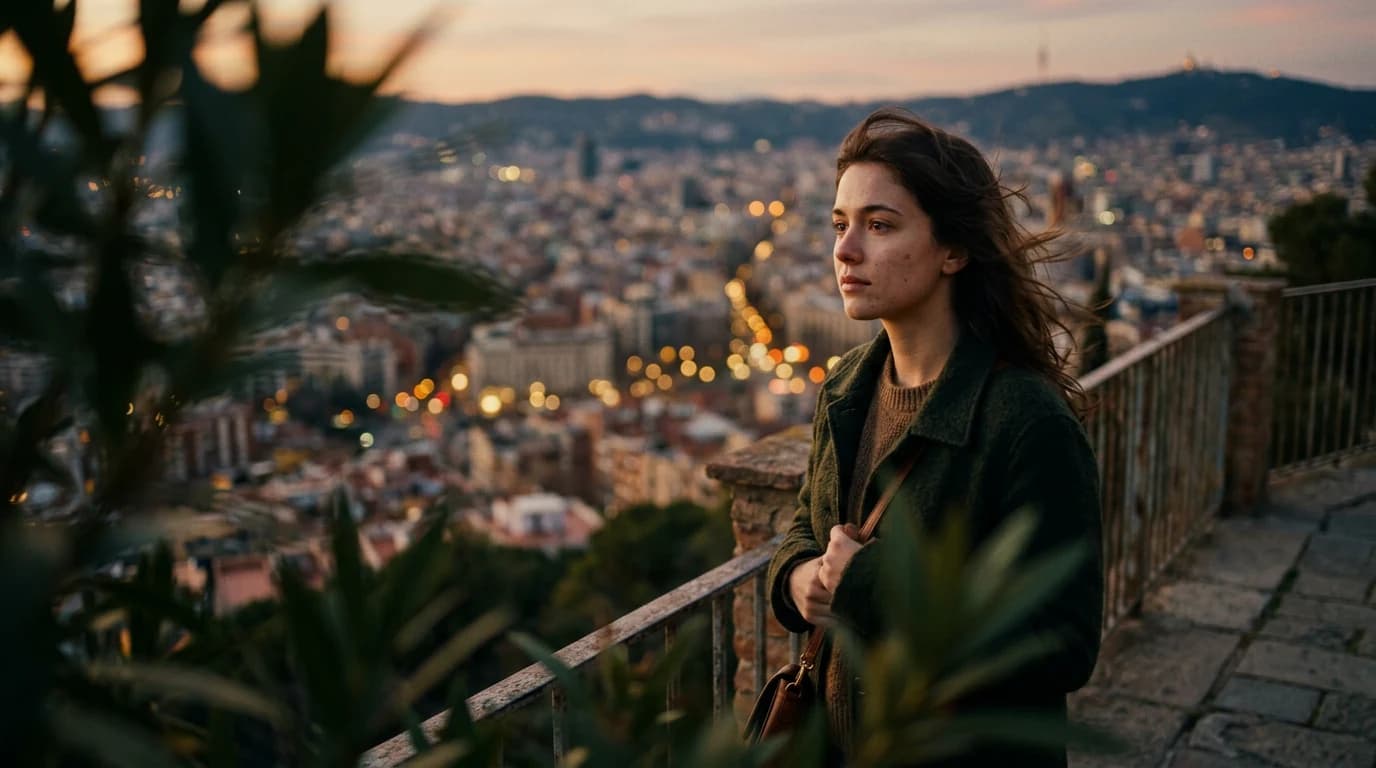
Exteriors: sky, branches, architecture
A dramatic sky and a sharp foreground can coexist if the highlights are controlled. Otherwise you get an HDR that eats the subject's contrast. The foreground blur on grass or branches can be beautiful, but it must follow the distance: twigs ten centimeters from the sensor do not blur like a building a hundred meters away.
When you add haze or light pollution, describe how this layer affects the distant planes rather than asking for "atmosphere" alone. The atmosphere has a thickness and a color.
Iteration and measurement notebook
For each validated image, add a line in a spreadsheet or a text file: focal length, distances, a subjective bokeh quality note from 1 to 5. After ten images, you will see which style your model holds best on your subject. It is not universal: two checkpoints can react differently to the same prompt.
If you compare two models, keep strictly the same prompt and the same seed when possible. Otherwise you compare noise and sampling talent, not the depth.
Frequent material mistakes
Hair on a blurred background requires a clean transition. Clothing meshes and window grids create moiré or artifacts when the model mixes sharpnesses. If you see patterns that "pulse" at zoom, simplify the pattern or reframe.
Windows between camera and subject change the depth reading: a dirty window or condensation can justify strange transitions, but an invisible and inconsistently blurred window kills the scene. Decide whether the window exists and how it reads.
Bokeh color and temperature
The light bubbles inherit the temperature of the sources. If your face key is cold and the bokeh is everywhere in warm orange with no justification, the viewer looks for the missing lamp. Name the sources: tungsten at the back, daylight on the face, or the reverse if you own a deliberate mix.
The bokeh saturation often follows the set saturation. If you push a whole image toward extreme colors, the blur becomes jam. Sometimes bring the background slightly more desaturated than the subject to keep the hierarchy.
Post: curve before additional blur
If you add blur on the background, do it after a curve that fixes the blacks and the highlights. Otherwise you blur muddy gray and burned white, which looks like a cheap filter. The highlight roll-off on the background sources helps draw credible bokeh bubbles.
Depth diagnostic table
| Sign | Interpretation | Action |
|---|---|---|
| Double light edges | cutout | reprompt the transition |
| Blurred wall too close to the nose | absent distance | add distances |
| Bokeh mixing round and oval | contradictory optics | a single look |
| Smooth face, garish background | failed hierarchy | key on the subject |
| Grid that vibrates | fine pattern | simplify or reframe |
A credible depth of field is a well-written geometry sentence, not a magic word in the prompt.
A last useful habit: look at your image as a thumbnail in the file explorer or very small on the screen. If the subject does not immediately stand out from the background, your blur or your contrast is not doing its separation job, even if the zoom reveals impressive details.
Trench warfare
"Bokeh" repeated ten times. Replace it with the distance and the shape of the highlights.
Global sharp afterward. You create halos at the edge of the subject.
HDR on the background and soft skin. Two aesthetics that fight.
Forgetting the horizon line outdoors. The perspective and the blur read together.
Pretending an 18mm gives the same isolation as an 85mm at equal distance. No: change the distance or the focal length.
The Wikipedia article on depth of field recalls the classic variables: aperture, focal length, focus distance, sensor size. Even if you do not simulate a physical camera to the pixel, aligning your language with these variables helps you write less vague prompts.
If you want everything sharp, you change the brief: it is no longer a story of bokeh but of controlled flat light and a readable set. The portrait checkpoints often help the faces but can simplify the backgrounds: test on your subject. The inpainting of the background alone is worth it when the subject already holds. If the model ignores your distances, shorten the prompt and isolate the geometry sentence.
FAQ
Foire aux questions
Réponses rapides aux questions les plus fréquentes sur cet article.
I put "f/1.4" and it does not work: why?
Not all models read the stops the same way. Add distance, focal length, and a description of the falloff. Think of the stop as a suggestion, not a guaranteed mechanical setting.
Anamorphic or spherical to start?
Spherical for stability. Anamorphic when you own the ovals and the flare. If you are starting, first master the subject-background distance with a spherical look; add the simulated anamorphic when your sharp-blur transitions are already stable.
Should the background be unreadable?
No. It must be subordinate to the subject, not erased into mud with no structure. A background can stay readable while being clearly more distant: the separation comes from the contrast, the color, and the degree of blur, not only from the erasure.
Why is my bokeh dirty?
Halos, simulated CA, or contrast too hard on the edges. Curve and transitions first. If the problem persists, lower the guidance or change the checkpoint: some models "like" the halos more than others on complex scenes.
The video from the image: any advice?
Consistent depth from the pilot image, modest movement, a background not too loaded with lines. If you see the bokeh "breathe" irregularly, it is often a sign that the scene was already ambiguous as a still.
I upscale and the blur becomes weird?
Normal: the upscale reinterprets the transitions. Sometimes it is better to regenerate at a larger resolution once the composition is frozen. If you have to upscale, prefer tools that preserve the subject's edges and watch the halos around the hair.
Several characters at different distances?
Name who is at the focus plane and where the others are. Otherwise the model chooses at random. If two faces must be sharp together, bring the planes closer or use a smaller aperture in your description, otherwise one of the two faces will pay the price of involuntary blur.
Does grain help?
A bit, to glue sharp and blur. It is not a replacement for a badly lit scene.
Editorial compliance section
Useful internal links: