How to Get a Cinema Render with Seedance 2
Settings and work habits to push a video engine toward a film render, with no demo look.
A video engine does not give you cinema by pressing a preset. It gives you pixels that move. Your role is to decide which pixels have the right to move, how much, and for what narrative purpose.
The tools' trailers often show cherry-picked scenes. Your daily life will look more like a series of attempts, corrections, and choices of what you accept as a realistic imperfection. That is good news: controlled imperfection looks like the world, hyper-perfection looks like a showroom.
If you arrive with a "cinema button" expectation, you will be frustrated in one afternoon. If you arrive with a miniature set checklist, you progress at each session, even when the model changes slightly. The "film" render appears when you align an honest pilot image, a modest movement, a credible sound, and a post that does not turn your clip into a 2000s TV ad. Seedance 2, like any tool of the same family, rewards the users who think shooting and editing, not a capabilities demo.
This guide assumes you accept back-and-forth. Not twenty mystical settings: a few stable principles, a file routine, and an ear plugged in early.
What "cinema" means here
Not an ultra-sharp image everywhere. Not a saturation that screams. Not an impossible tracking shot that twists the architecture. Classic cinema lives on light choices, frames that direct the gaze, sound silences, and cuts that compress time.
When you generate video, you add a constraint: temporal consistency. A still image can be beautiful with a small error hidden in the corner. A video reveals the error in movement. Hence the importance of how to turn an AI image into fluid, credible video even before talking about tool-specific settings.
Pilot image: the real lever
First lock the light, the subject-background distance, and the framing. A simple side key beats ten "moody" adjectives. A credible shadow under the nose beats a "cinematic" word repeated.
Avoid pilot images where the face is smooth like a sphere and the background hyper-detailed: the video model will oscillate between two detail levels. Prefer a clear hierarchy: a readable face triangle, a background that supports without stealing the light.
If your project is a short fiction, creating a 100% AI short film with no camera or actors gives a map of the steps where the video is only a brick in a larger chain.
Movement: modesty pays
A slow push-in, a very slow pan, a short truck. Avoid orbits, 360° rotations, and big tracking shots on walls covered with lines at the start. Each vertical line is a stress test for the temporal geometry.
If the tool exposes a movement strength, start low. A moderate amplitude often keeps the hands and the jaw stable. When you raise the amplitude, watch three zones: corners of the frame, hands, hair in front of the face.
To go deeper into the movement vocabulary, how to improve motion realism in AI video details strategies that stay valid whatever the engine.
Light and color before the LUT
LUTs laid on an image with no lighting hierarchy give orange skin or muddy shadows. First work the global contrast and the highlight roll-off. When the curve holds, the saturation requires less effort.
To write the light from the pilot image, how to describe light like a director of photography in a prompt stays a solid base: key, fill, practicals, direction.
Skin, fabrics, reflections
On faces, often isolate the skin when you push a strong colored look. The cheek reds must keep blood, not paint. On fabrics, avoid the sharp that turns wool into plastic. On glasses and windows, simplify what the reflection must show: an impossible reflection kills the shot faster than a slight blur.
Duration, rhythm and frame rate
An eight-second clip with three different ideas looks like a nervous edit with no intention. An eight-second clip with one clear idea looks like a scene. Choose what the viewer must notice in the first, second, third second. If you cannot say it in one sentence, your brief is still too broad.
The cadence of the micro movements matters: a blink at the right moment sells the human better than a camera orbit. Ask for slow and repeatable micro actions rather than wide unpredictable gestures.
Settings: philosophy rather than a magic list
The interfaces evolve, but the logic stays: consistency with the source, controlled amplitude, duration proportionate to the complexity. If your set is busy, a short duration with weak movement beats a long ambitious sequence.
When you compare two exports, change one parameter at a time. Otherwise you will not be able to explain to the client why version B is better, and you will not be able to reproduce it in two weeks.
Keep a capture of the interface and the exact text of the prompt in the same folder as the video file. The "creative mystery" is a technical debt.
Sound: half of the judgment
A clean mute clip still looks like a showroom. Add a room tone, a distant street, a room that lives. Then only music or voice. The mix reveals the dead shots: if the image does not move when the sound suggests movement, you see the problem immediately.
Recommended workflow
Step 1: a five-line brief
Subject, place, time, emotion, visual prohibitions. No hollow poetry.
Step 2: three pilot images
Same character, three close lights. Choose the one that holds the skin at zoom.
Step 3: a short test clip
Six to ten seconds, minimal movement. Watch on a phone and on a calibrated screen.
Step 4: a draft sound
Ambience + room noise. Deliberately cut at certain moments to test the silence.
Step 5: editing
Reframe slightly, hard cut, add a fine grain if needed. Avoid the global sharp on the face.
Step 6: master
Export with headroom on the highlights for the social encoding. Document the files.
Before validating the master, watch the clip with no music once, then with no image once keeping only the sound. These two reads reveal problems the "all mixed" version masks: useless movement, dialogue too long, ambience too flat.
Example of a movement instruction to adapt:
Very slow dolly-in, 8 seconds, lens height at chest level.
Subject minimal movement: subtle breathing, eyes stable.
Background stays softly out of focus, vertical lines stable.
Avoid: face morphing, wobbling walls, extra fingers, flicker on skin.
Second example, a wider shot:
Slow lateral camera move, short distance, 6 seconds.
Keep subject centered, background simplified (few vertical edges).
Overcast daylight, soft shadows, natural skin texture.
Avoid: extreme motion blur, duplicated reflections, warped windows.
Scenarios
Product teaser. A clean but not clinical look: side key, controlled reflections, almost no movement. The product must stay readable six seconds in a row.
Dialogue scene. Separate reaction shots rather than a single long talking shot. The edit carries the silences.
Mood landscape. Light atmospheric movement: haze, clouds, water. Avoid characters in close-up if you have not stabilized the faces beforehand.
Documentary imitation, interview to camera. A stable key, a background slightly blurred but geometrically simple. Almost no movement on the subject, a camera micro-move only if you own the risk. The credible room sound does half the work here.
Urban B-roll. Short six-second loops with no human subject in the foreground: reflections, passersby in blur, signs. You then build the city by assembly, not by a single miracle shot.
Formats and framing for delivery
16:9 lets the set and the shoulders breathe. 9:16 imposes a vertical hierarchy: a higher face, anticipated hands, fewer elements on the edges. If you generate horizontal then reframe to vertical without rethinking the composition, you get cut-off heads and gestures that enter the frame like accidents.
2.39:1 cinema scope is a frame choice, not a quality guarantee. If you adopt it, make sure your subtitles and your readable title stay in safe zones. The black bars do not make an image more "serious" if the light is flat.
Iterations and compute-time management
Plan short sessions rather than a marathon: fatigue makes you accept artifacts you would reject the next day. Between two sessions, note three lines: what is stuck, what you have already tried, the next single hypothesis.
If you have to choose between regenerating ten mediocre clips or three well-briefed clips, take the three. Quality almost always follows the clarity of the brief, not the number of clicks.
When you archive, separate rejects and selects in distinct folders. Otherwise you will reopen an old "almost good" file and lose an hour wondering again why you had abandoned it.
Collaboration and feedback
If you show it to someone, ask a precise question: "where do you look first?" rather than "do you like it?". The first question reveals the visual hierarchy. If everyone looks at a background detail instead of the subject, your framing or your contrast guides the gaze badly.
For a client, present two options maximum with named differences: "calm version" versus "more contrasted version". Ten vague options paralyze the decision and force you to multiply free renders.
Field deep dive: How to get a cinema render with Seedance 2
This chapter extends the angle "Settings and work habits to push a video engine toward a film render, with no demo look." for the real subject behind comment-obtenir-rendu-cinema-avec-seedance-2. The goal is not to stack adjectives, but to install a short QA loop you can reuse on every deliverable: capture, note, compare, decide, archive. Most creators waste time because they mix three variables in one session, then blame the model. When you separate light, composition, texture, intention, you get back an honest diagnosis and measurable progress.
"One variable" protocol (30 minutes)
Minute 0 to 5: write the sentence "what the viewer must believe with no caption". Minute 5 to 12: list three possible visual proofs (cast shadow, prop in use, consistent reflection). Minute 12 to 22: generate two images that differ by only one of those proofs. Minute 22 to 28: test on a mobile thumbnail and full screen. Minute 28 to 30: choose A or B and name the winning criterion in the project file. This protocol avoids the drift where each regen changes everything except the initial problem.
Scenarios A, B, C with pivots
Scenario A. Render too clean, too showroom. Pivot: add a localized trace of use and a more marked side light, without touching the subject if the geometry is good. Scenario B. Cluttered image with no hierarchy. Pivot: remove two objects from the prompt, recenter the contrast on the subject, or tighten the framing. Scenario C. Spectacular but cold image. Pivot: lower the global saturation slightly, add a fine, even grain in post, then regenerate only if the geometry or the perspective still lies.
Trench warfare: ten frequent traps
- Fixing everything at once. You no longer know what saved the image.
- Comparing only full screen. Mobile often exposes fake luxury.
- Ignoring rhythm upstream of the video. Even upstream, think about cutting and the breathing of shots.
- Copy-pasting prompts with no local brief. The words must fit your real subject.
- Aggressive global sharpening. Garish edges read as "digital".
- Too many contradictory adjectives. One dominant intention is enough at the start.
- No archive text file. You lose the seed, the version, and the reason for the choice.
- Validating while tired. Fatigue makes "beautiful" out of what is only familiar.
- Stacking models on the same day. You compare different chains, not settings.
- Delivering with no A/B. The client or your future self will not know what was acceptable.
Quick decision table
| If you observe | Priority action |
|---|---|
| inconsistent light | simplify the sources |
| subject drowned | framing or contrast hierarchy |
| plastic texture | fine grain or less HDR |
| impossible hands | off-frame or trivial action |
| catalog set | micro wear and a functional prop |
| empty sky | cloud volume or motivated haze |
| impossible reflections | reduce the contradictory sources |
Client or commissioner workshop
Even for yourself, write a mini brief: audience, channel, expected reading time, prohibitions (violence, brands, real faces). For a team, add a "proof of compliance" column: capture of the service's terms, model version, export date. That column saves you when a broadcaster asks where the image comes from.
Extended FAQ
Should I deliver two versions? Yes, A and B with one named sentence of difference, otherwise the discussion stays vague. Should I document the prompts? Yes, even partially: it is your internal quality insurance. What if the model changes? Set a test brief and compare before continuing a series. Does manual retouching cheat? No if you own the chain and the contractual limits. How much time per serious image? Often longer in validation than in raw generation, plan for it in the quote. Do I need a technical target? Yes: final resolution, color space, headroom on highlights if there is social compression. And intellectual property? Check the terms of service and the rights on the references included in the prompt.
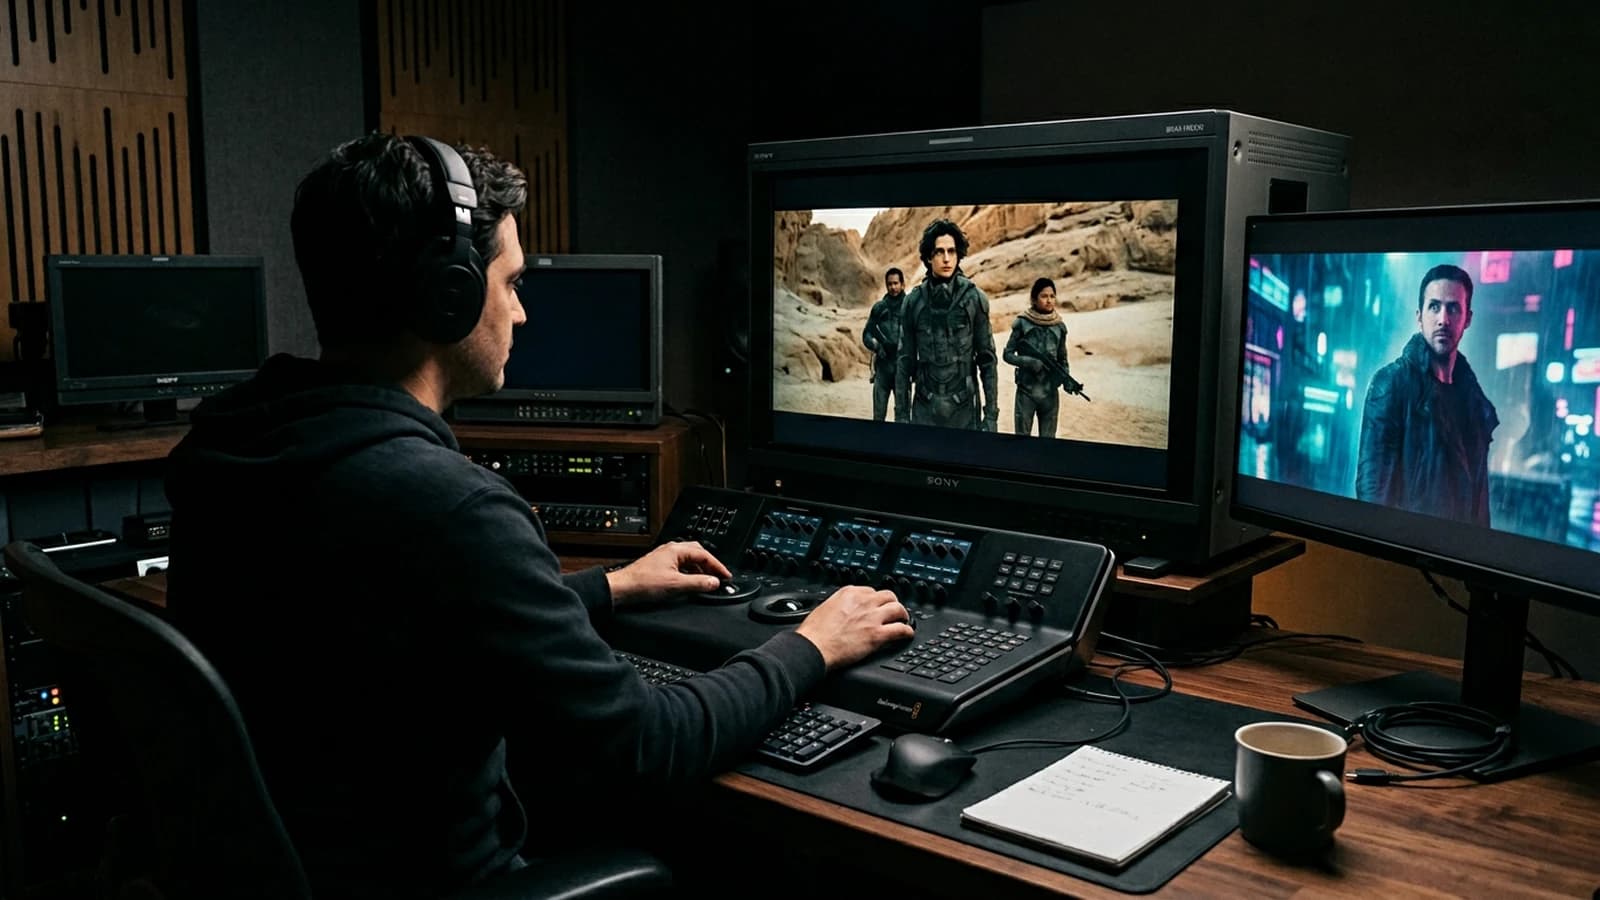
Multi-screen control station
Minimum chain: main monitor, standard laptop, smartphone. If you only have two screens, send a test export to your phone through a clean channel (not a messenger that recompresses endlessly). Note the perceived difference on skin, edges, and micro-contrasts. Many "AI" images become so mostly after a second involuntary compression.
Useful internal links
Cross-reference with why your prompt does not work, and how to fix it, the prompt mistakes that make an AI image look artificial, and how to control visual style in an AI generation. If your subject touches video, also link to how to structure an AI video like a real film and to how to improve motion realism in AI video.
End-of-session log (template)
Date:
Slug / file:
Hypothesis of the day:
Variable tested:
Result A vs B:
Decision:
Next test:
Operational summary
For comment-obtenir-rendu-cinema-avec-seedance-2, keep three lines in your notebook: intention in one sentence, lighting law in one sentence, material proof in one sentence. If one is missing, you are not ready to regenerate en masse: you are ready to diagnose. Long-term quality comes from that discipline, not from the latest model released on Tuesday.
Honest limits
Hands, object interactions, dense crowds, complex reflections stay risk zones. It is not a personal criticism of your talent: it is the state of the tools. Work around them by framing, by cutting, by simplifying the set, or by a reaction shot instead of the hand close-up.
Profile or rear three-quarter faces often require more discipline in the image prompt. If an angle fails systematically, change the angle rather than hammering the same setting.
Post and compression
A fine grain masks micro encoding instabilities. Aggressive sharpening reveals them. On social, the upload re-encodes: keep headroom on the whites and a light grain to avoid the "digital plastic" after compression.
Diagnostic table
| Symptom | Probable cause | First lever |
|---|---|---|
| Wall ripples | tracking shot + lines | shorten the move |
| Face pulses | high amplitude | lower the strength |
| Spongy hands | hand close-up | reframe or off-frame |
| HDR sky | burned highlights | curve before LUT |
| "Ad" clip | saturation + sharp | come back to the curve |
A film render is a sum of restraint. What you remove from the signal counts as much as what you add.
Trench warfare
Comparing apples and oranges. Two exports with different durations or movements prove nothing. Normalize the duration, framing, and amplitude before judging a setting.
Neglecting the color temperature between shots. Same scene, two different whites: the viewer reads a shooting error. Hook a reference on the edge of the screen.
Believing that noise removes the plastic. Grain does not replace a flat light. It sometimes masks micro problems, not a scene with no volume.
Pushing the sharpness to "save" a soft shot. You get hard edges and radioactive faces. Correct at the source or change the shot.
Absolute silence. Add room hiss, then cut where you want the real void.
LUT before light. You color the flat. Get the source hierarchy back.
A single long clip to say everything. Cut. The edit is your ally.
Neglecting the phone. Half the audience reads on mobile; the contrast often explodes there.
A "demo" pilot image too clean. You will pay it in movement.
Cinematography links light, camera and movement at the service of the story. Even in generation, this definition stays useful: if the light tells nothing, no engine will save the emotion.
For a character continuity across several shots, keep a stable sheet, the same light landmarks, and reframes that do not move the major features. The native transitions between clips can serve a deliberate morphing; for a sober story, a cut and a sound often avoid dubious geometric mixes.
FAQ
Foire aux questions
Réponses rapides aux questions les plus fréquentes sur cet article.
Does Seedance 2 replace a shoot?
No for most serious uses. Yes for mockups, impossible shots, or fast iterations with owned limits. The useful question is "which shot can I not get otherwise", not "how do I replace everything".
Should I shoot in 4K right away?
Iterate where it is fast, upscale when the direction is good. The upscale of a clip whose movement lies only enlarges the lie in high definition.
Why does my clip look like a demo?
Too much movement, too much sharpness, too much saturation, no sound. Reverse these axes one by one. Also add an honest critique: does your clip show a narrative intention, or only that the tool knows how to move pixels?
The parameters change between versions: how do I track them?
Keep screenshots and a text file per session. Always compare at equal duration and movement. If an update breaks a pipeline, you can at least go back to the last documented combo without guessing.
Simulated handheld?
A very low amplitude or post on the background only. Otherwise the face trembles like jelly. If you want documentary chaos, start with a simple set: fewer lines, less rippling.
Long dialogues?
Cut into shots, shorten the spoken text, add silences. If a sentence holds on three lines on screen, the viewer reads instead of listening: cut into two visual beats.
The music?
Choose ranges with dynamic emptiness. Avoid the orchestral wall on intimate sentences. If the music already tells the whole emotion, your images become illustration and your clip loses tension.
Is it usable for a client?
It depends on the rights, the contract, and the transparency about the production chain. Document everything, including the retouches, the sound sources, and the known pipeline limitations.
A last useful reminder, move forward in short and measurable iterations.