Cooking, Smoke and Steam: a Realistic Render in AI Video
Warm light, particles, backlight and post for credible kitchen steam with no generic haze.
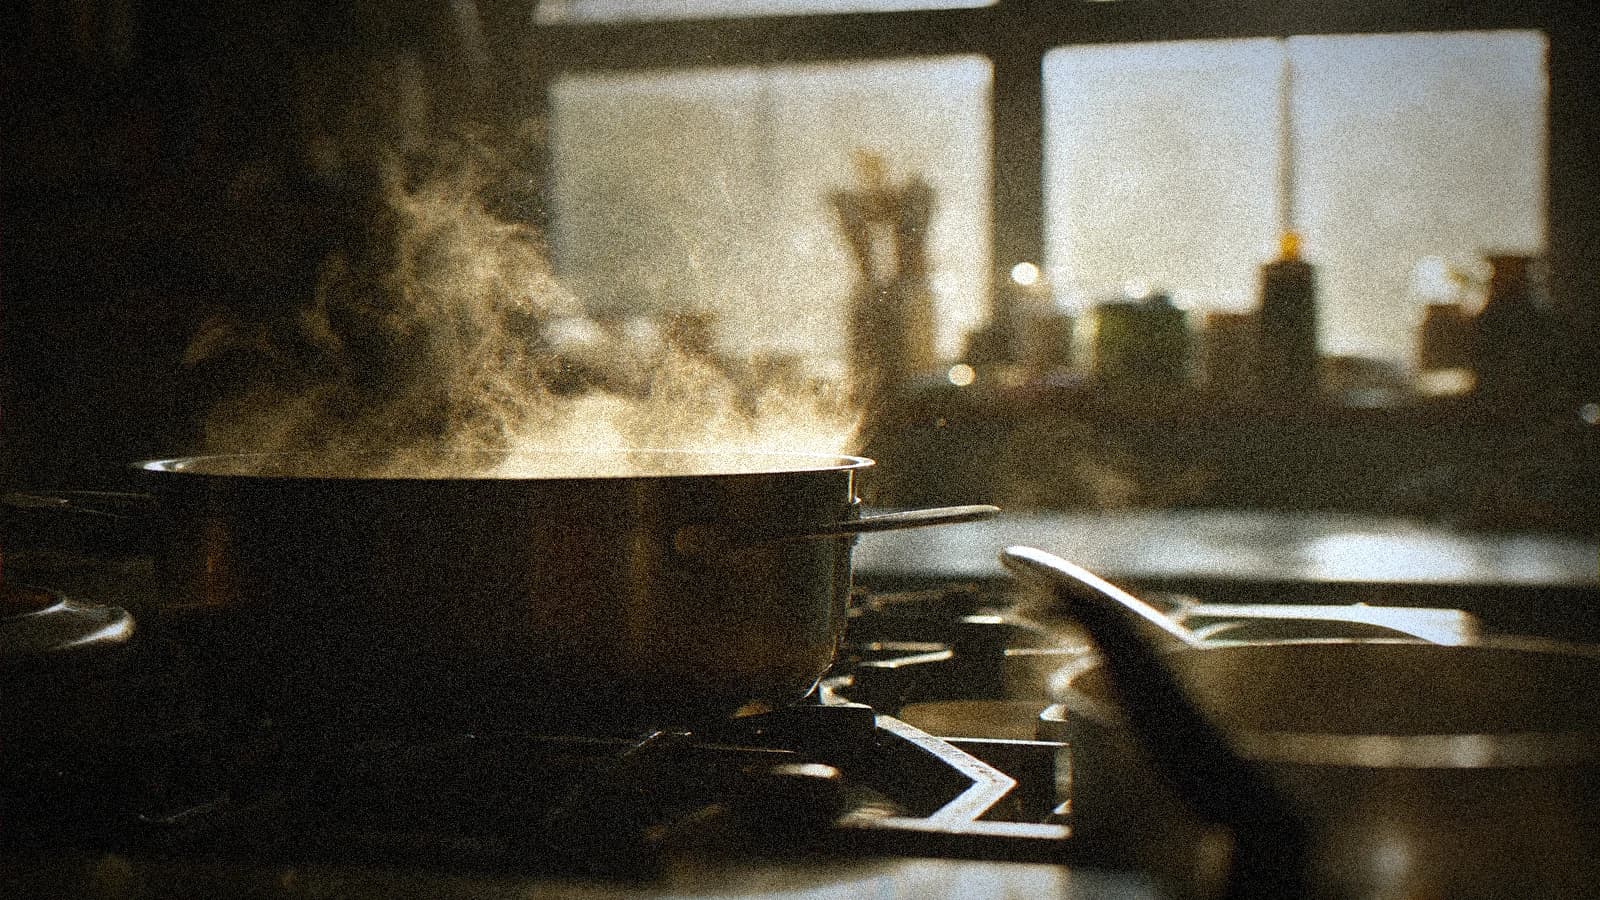
You want to film a living kitchen: a sizzling pan, rising steam, light smoke at the backlight. In AI, the result quickly tips toward a generic white haze, a plastic smoke or a fog that invades the whole scene. The image loses its taste, in the literal sense.
The truth is that smoke and steam are luminous materials. With no light and density logic, the engine improvises a "cloud" effect that smells of a technical demo. In this article, I give you a concrete workflow to get a credible, appetizing, and narratively useful kitchen render.
Why kitchen steam often fails in AI
Credible steam depends on four elements:
- A readable heat source
- A structured light
- A subtle movement
- A progressive density
When one is missing, the model compensates with a uniform white mass. Result: no kitchen, just fog.
To avoid that, think "culinary photo direction" before thinking "atmospheric effect". This logic joins how to describe light like a director of photography in a prompt.
💡 Frank's Cut: if your steam is visible with no backlight, it is often too dense. Realistic steam reveals itself through the light, not through the opacity.
Key difference: steam, smoke, haze
Many prompts mix these notions.
- Steam: light, fast, translucent, attached to the heat source.
- Cooking smoke: denser, directional, sometimes grayed.
- Haze: diffuse, spread out, not localized.
If you write "smoke and fog everywhere", you rarely get a credible culinary result.
Settings table for kitchen scenes
| Parameter | Starting value | Goal | Frequent drift |
|---|---|---|---|
| Clip duration | 3 to 5 s | Control turbulence | Mass that swells over the shot |
| Key light | Warm lateral or backlight | Read the particles | Flat lighting |
| Steam density | Low to medium | Culinary realism | Opaque fog |
| Camera movement | Slow | Stabilize material | Fast pan that breaks the particles |
| Sharpness | Moderate | Keep organic texture | Digital sharpen |
If your shot drifts, come back to this base before experimenting.
Effective prompting for credible steam
You must describe behavior and light, not just the effect.
Useful example:
warm kitchen scene, subtle steam rising from pot, backlight revealing fine particles,
natural convection flow, realistic moisture haze, cinematic food lighting
Risky example:
dramatic heavy smoke in kitchen, thick fog everywhere, ultra cinematic
The second prompt pushes toward a disaster or fire render.
Complete workflow: from the pilot to the final shot
Step 1: lock the composition with no strong steam
First, validate:
- framing;
- material of the food;
- reflections on the stainless steel;
- color atmosphere.
If the base is weak, the steam will not save anything.
Step 2: introduce a light steam
Add a layer of discreet steam, localized above the heat source. The goal is not spectacular, it is credible.
Step 3: test the dynamics
Generate 4 variants with the same prompt. Look for:
- a plausible rising direction;
- a density that evolves naturally;
- the absence of a white "blob".
Rank A/B/C as usual.
Step 4: correct locally
If a zone becomes too opaque, correct locally instead of regenerating the whole shot. This logic saves you time, as in local inpainting to retouch eyes and hands in AI.
Step 5: harmonize the post
Adjust:
- steam highlights;
- global saturation;
- micro contrast.
A too-aggressive treatment transforms the steam into a digital layer.

Lighting: the absolute key to realism
The steam exists visually only through the light.
Reliable minimal setup
- a lateral warm source (kitchen practical);
- a soft backlight to reveal the particles;
- a weak fill to keep relief.
What to avoid
- flat frontal light;
- burned highlights;
- inconsistent color temperature.
You want a living kitchen, not a sterile studio.
Concrete production cases
Case A: local restaurant ad
Goal: appetite and human warmth.
What works:
- light steam;
- close shot of a pot;
- simple cook gestures.
What breaks:
- thick fire-type smoke;
- too-cold color.
Case B: recipe social content
Goal: fast impact on mobile.
What works:
- short shots;
- steam visible in the backlight;
- clean transitions.
What breaks:
- long shots saturated with effects;
- poorly readable food details.
Case C: intimate kitchen fiction
Goal: narrative atmosphere.
What works:
- steam as an ambience texture;
- cooking noise in the sound design;
- slow camera movement.
You can reinforce this point with how to integrate sound design in AI video.
Particle control and food readability
The frequent danger is to mask the product. In cooking, the steam must support the food, not erase it.
Checklist:
- the food stays identifiable;
- the steam does not cover the point of interest;
- the colors stay appetizing;
- the shine stays natural.
If your dish disappears behind a veil, your shot fails commercially.
Culinary post-production: what really counts
Recommended order:
- Global exposure.
- White balance.
- Soft local contrast.
- Selective saturation of the warm tones.
- Fine grain if necessary.
Avoid the extreme LUTs that unify everything in orange. Food brands want credible indulgence, not a permanent dramatic filter.
Useful link: how to correct the colors of an AI video.
Typical mistakes to avoid
Mistake: confusing steam and fog
Solution: low density, localized source.
Mistake: fast camera movement
Solution: slow down to preserve the reading of the particles.
Mistake: flat light
Solution: create a light backlight.
Mistake: sharpness over-treatment
Solution: keep an organic texture, not a digital one.
Mistake: shots too long
Solution: short clips and a rhythmic edit.
Mistake: forgetting the narration
Solution: make the steam a support of emotion, not a gadget.
Agency process for food AI content
If you produce at volume:
- create 3 steam density presets (low, medium, signature);
- document the light settings;
- impose an appetite/realism QA grid.
Example of a log:
recipe_sc03
- base_comp_v02
- steam_light_v03 (A)
- steam_medium_v02 (B)
- final_grade_food_v01
This follow-up lets you hold the deadlines without sacrificing the quality.
Strategic internal links
To go deeper:
- how to create natural light in an AI image
- how to improve post-production realism in AI video
- how to edit an AI video in CapCut like a pro
- how to produce an AI video in 24h
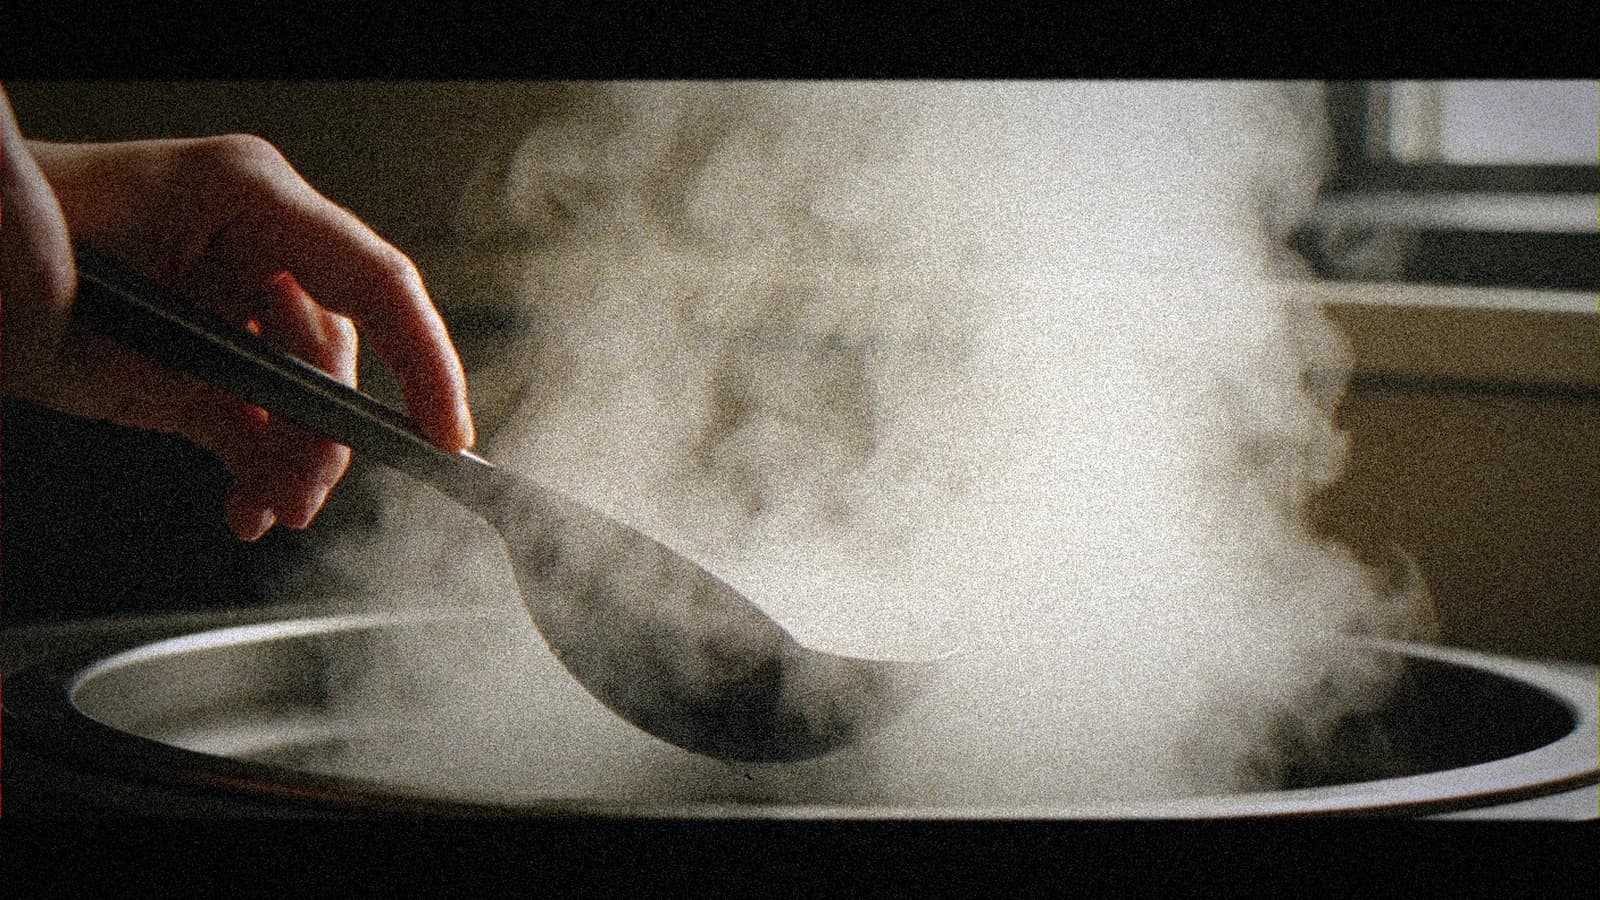
Credible steam in AI is a signal of visual mastery. It is not a decorative effect. It is a narrative tool that conveys heat, texture and temporality. When you direct it correctly, you move from an artificial render to a scene that makes you hungry and that tells something.
Range hood, window, and air logic (often forgotten)
Credible steam obeys an exit. Hood on, window ajar, or a simple convection upward in a calm room. If you do not give this logic to the model, it fills the room like a concert fog. One sentence in the prompt is enough: "steam rises toward range hood, thin wisps, not fog filling room".
In editing, you can reinforce this reading with a discreet sound: hood blow, pan sizzle, lid click. The brain accepts a light steam better when the ear confirms the kitchen. For the global sound, pick up the bases of the complete image-to-video workflow: ambience laid early, not at the last minute.
Typical session (45 min, one pot shot): ten minutes brief + pilot, twenty minutes 4s video batch, ten minutes steam post + curve, five minutes mobile QA. If you have no A shot in forty-five minutes, lower the steam density before touching the resolution.
On color grading, remember a simple rule for food: protect the highlights of the greasy reflections and the steam, otherwise you get halos after compression. A slight roll-off on the whites is better than a contrast that "pops" on an OLED screen but melts on mobile TikTok after each new upload.
Foire aux questions
Réponses rapides aux questions les plus fréquentes sur cet article.
What is the difference between realistic steam and artificial fog in AI video?
Realistic steam stays localized, translucent and tied to an identifiable heat source. It rises, dilutes, lets the subject be read. The artificial fog invades the image uniformly with no convection logic. In QA, zoom on the edges of the pot: if the steam passes through the metal or ignores the lid, you are in haze mode, not kitchen mode. Fix the prompt before adding grain.
How long should a kitchen clip with steam last?
Three to five seconds in initial generation. This duration limits the density drifts and eases the editing into appetizing sequences. If you need ten seconds of action, chain two stable clips with the same pilot and the same light direction, rather than a single long clip that makes the food and the smoke mutate.
What type of light works best?
A soft backlight combined with a lateral warm light. It is this duo that reveals the particles without crushing the food textures. Avoid the frontal flash that flattens everything. As a photo reference, think of the end-of-day light in a kitchen with a side window, not the beauty studio light.
Should I write "smoke" or "steam" in the prompt?
For the kitchen, favor "steam" when you want cooking steam. "Smoke" is useful for more marked cookings (grill, flambé), but must stay controlled to avoid the fire effect. Mixing the two words with no precision is inviting the model to choose the worst of both worlds.
Why does my steam look white and opaque?
Often because of a too-high density and a flat lighting. Lower the steam intensity in the prompt, reinforce the backlight, and avoid over-treating the contrast in post. If the food becomes plastic at the same time, the problem is global: restart from the pilot, not from an isolated steam mask.
Can you fix a failed steam in post only?
Partially. The post can harmonize the whole, soften an excessive opacity, or mask a zone. A false particle dynamic at the generation (swirls, passing through objects) stays hard to fully catch up. So invest in the generation for the physics, keep the post for the color and the grain.
Is this method suitable for short social content?
Yes, it is even ideal. Short, well-lit and well-edited shots produce a premium render that survives the mobile compression. Frame tight on the material (bubbles, condensation, water surface) rather than a wide shot where the steam becomes visual noise.
Can I combine AI steam and stock steam?
Yes in a clean hybrid: generate a stable shot with no over-steam, add a fine stock layer in screen or add, align the light direction. Document the source for the client. The hybrid often beats a generation that tries to do everything in one click.
A good kitchen steam in AI is directed like a supporting actor: discreet, accurate, useful to the story. If it takes all the space, your shot loses its credibility. If it is mastered, it immediately elevates the perceived quality.
Mini "lunch service" playbook to produce fast without losing quality
When you must put out several variations in the same day, the main risk is degrading the consistency. You change a prompt, then a LUT, then a texture, and after an hour you no longer know why version B seems better than version A. To avoid that, adopt a short, repeatable, and documented playbook.
Block 1: preparation (10 minutes)
- define the main food and its expected texture;
- set a single light intention;
- choose a priority camera angle;
- note two visual prohibitions (e.g.: no global fog, no black smoke).
Block 2: generation (20 minutes)
Launch a compact batch of short variants, same base seed, then a slight variation of the steam level. Do not touch the composition as long as you have not validated the air behavior. The reflex to reframe too early often creates more problems than it solves.
Block 3: selection (5 minutes)
Take the most credible version in movement, not the most "instagrammable" in a still frame. A shot must live at playback. If the steam looks like a fixed sheet after two seconds, reject it.
Block 4: finish (10 minutes)
Correct locally, adjust the color, then immediately export a mobile version for a test. If the scene holds on mobile, it will almost always hold on desktop. The opposite is not guaranteed.
Client feedback method to avoid fuzzy returns
Returns like "it looks like fake smoke" are hard to act on. Structure the validation with three criteria rated from 1 to 5:
- Culinary readability: do we clearly see the food and its cooking.
- Atmospheric credibility: does the steam follow a physical logic.
- Brand consistency: does the scene match the visual tone of the campaign.
Ask the client to comment on each rating with a precise example. This format drastically reduces the unproductive retouch loops and accelerates the delivery.
Final checklist before publication
- the shot stays readable at 100% and in full-screen mobile;
- the steam is visible without masking the main subject;
- the warm tones stay indulgent, not fluorescent orange;
- no major artifact around the metallic edges;
- the cooking sound supports the image without taking over;
- the exported version keeps its consistency after compression.
If this checklist is validated, your kitchen shot is ready for social distribution, local advertising or insertion into a brand film.
Related articles
 Tutoriels
Generating a Realistic Crowd With No Clones or Identical Faces
Breakdown, depth, costume variation and post for credible crowd shots in fiction and advertising.
 Tutoriels
HaiLuo / MiniMax Workflow for a Realistic AI Short Film
A complete HaiLuo and MiniMax chain: brief, pilot, modest movement, QA and post for a credible short film with no demo look.
 Tutoriels
How to Add Realistic Motion Blur
After an AI video generation that is too sharp, motion blur becomes a question of perceived physics: plausible temporal integration, vectors that read together, a serious software chronology and mobile tests against the double blur that delivers, once again, a tired demo.